

Pitts S1 C-GIPS
Repairs and Modifications
2006
| In 2006 all my local airports went to a Mode C requirement. I
had to install a transponder and selected a Microair T2000 which I powered with a small
4 ah gelcel battery. After looking at all the Odyssey 680 batteries installed
in RV's, I decided to try mounting one permanently to both power the transponder and
start the airplane. Now that there was a battery on board, the old
mechanical tach with the two angle drives could be replaced with an electric
tach, and there was power to back-up the handheld
radio (Yuasa VXA-220). The APU plug start feature was removed. Old man's
airplane now. The fully charged 680 could start the plane about a dozen times
and provide power for probably 10 hours of flying. Later in 2006 I dropped a valve while flying an Unlimited contest and had to replace a cylinder. First engine work since 1987 and perhaps an omen. To finish the contest I was offered to fly the Wolf Pitts owned by Bob Higbee. Up against some Zivko 540's I came in second in the Free (my first try at the controls) and then won the Unknown. Ever since Norm Willis had first shown up flying his SteveWolf custom built Wolf Pitts I had been coveting a try at the handles. I wasn't disappointed and suddenly my plane needed updating.
|
 |
 |
| Antennas installed on the belly. | Odyssey 680 battery- modern times |
2007
| Into the 2007 season. While tracking down an oil leak around the front seal I found a cracked crankshaft. Ken Vike of Vike Aeromotive in Kamloops did the honors. He found a few other issues as well that confirmed that it was perhaps fortuitous to open up the engine while it was parked in a hangar instead of deadsticked into a creekbed. The "0" time O-360 B4 wide deck engine looks like jewelry - but it isn't just for show, cranking out 191 hp at 2700 with the high compression pistons. |
 |
 |
| The dye check to confirm a need for further investigation. Next came a magnetic particle NDT check to conclusively determine a crack. | Another Ken Vike masterpiece. If you need engine work, give him a call at 250-828-9444. <http://vikeaeromotive.tripod.com> |
2008
RV Gear Mod
Avionics and Panel
SPOT Messenger Test
| "Spot Messenger" installed for testing. Automatic Satellite Tracking on cross-country trips, ELT function, "I'm OK" or "I need HELP" messages to a loved one. |
 |
| Bracket is a simple piece of .032 with a bent ear and some velcro on it. Slides into a slot made from a piece of .025 between a couple of canopy screws. |
 |
|
Sample from a recent 400nm trip. Bingo, position reports automatically every 10 minutes to everyone with your web page link and a password. Plus bookends "I'm OK" messages at the start and finish sent to email addresses and SMS cellphones. It didn't miss a single report, hit one of the globalstar satellites every time. I'm satisfied. |
 |
Sept 2008 - Rerig and re-spade
| Post AWAC. Loose aileron brackets with a few months flying still left in the year. Tightened them, then removed the spades for a full re-rig. Time to get rid of that four spade "porcupine" look and go back to two spades on the bottom ailerons. |
| Checked Mike Davis' web page to see how he'd done his, decided on the newer triangle shape, and matched the spade area from the original four spades. New spade size is 12" wide, 9" long. Taper starts at 3" from the aft edge. Used 0.125" aluminum plate, cut on a bandsaw, then alodined and primered. Area of the old is 36 square inches, new is 72 square inches. |
| Here's the old and new spade compared:
|
| First rigged and flight-tested the wings to fly level and matched
incidence with no twist. Had to add a couple of washers under the
aft end of one of the I struts to keep a wing from dropping. Wings
look to be set for about 0 degrees incidence instead of the more usual
1.5 degrees. Then installed one spade set to parallel the chord
line and rechecked the trim in flight. Shimmed the spade with
washers until aircraft flew neutral roll trim again, then installed the
second spade and shimmed it until the trim was same neutral as without
the spades. Checked the horizontal stabilizer and found it rigged to +1 degree instead of +2. Still, elevator seems to fly in close to neutral trail so I'll leave it for now. Especially after realizing that the bolts on the front tube would have to be lengthened, with all that would entail........ Elevator travel adjusted to 25 degree up and down (spec +/- 2 degree). Ailerons the same at 25 degrees up and down (adjusted at the the stopbolts on the side of the stick). Rudder is 30 degrees left and right. |
| 2009
|
||
| Re-fabric Wings - moved
to its own section.
|
||
| Stick Slop Stick had some side to side play that I identified came from the two stub bushings welded onto the torque tube getting worn. Maybe some industrial Loctite would have fixed it, but I did it the hard way: removed the tube, drilled out the old bushing, welded in new ones, and repainted the torque tube red. BTW, I've noticed a few other older Pitts, S-1 and S-2 with the same lateral play after a few years.
|
||
| Honey, I Shrunk the Spades Felt I was just a little over-spaded, so I trimmed 1/2" of the sides and front. Area now 65 sq inches instead of 72.
|
 |
|
| Cabane Fairing Picked up a fairing from Raven Aircraft. Should have mounted it to the wing before reinstalling the wings, then done the trimming to fit the cabanes instead of doing all the trimming and fitting with the wing on the plane. Reminds me of a banana hammock, don't ask me why. |
 |
|
Tailwheel Locking Lever Spring Standard spring is made from .078 "music wire", commonly found in hobby shops. I copied Raven Aircraft's double spring concept using .062 music wire instead.
|
 |
|
Replace old Bendix with new Slick Magnetos and Harness. Replaced the old Bendix (last overhauled in 1990 - time flies) mags with new Champion/Slick 4370 RH and 4373 (impulse) LH. Timed 25 degrees. Firing order is 1-3-2-4. Timing is simple - remove the wiring harness cap, line crank index up with 25 BTC on compression for #1 (remove the spark plug and put your thumb over the hole) stick the special pin in the top hole on the back of the mag for a Left Hand rotation timing. Mag is now ready to fire #1 cyl. Slide it onto the gears, nuts snug and hook up the buzzbox (tired of borrowing, I'm going to get one) to sync the mags. |
The wiring wasn't the same as the
Bendix - the RH mag feeds the top 1-3 plugs not the bottom. The wire
lengths on the new harness didn't seem right when I put it in
incorrectly the first time so after a quick call to Champion they told
me that they had even labelled the sparkplug ends with T1 for top #1, B2
for bottom #2, etc. Now even a pilot can figure it out. The screws on wiring harness caps can be turned with either a simple blade screwdriver or a T-20 torx bit. Handy to know in tight quarters like an S1. If you get the colored harness (I went with red, of course) you do not use the plastic clips in the little clamps that hold the harness wires. I guess they are a larger diameter and the plastic grips them a little too tight. The engine gear on the impluse mag came off easily enough, the other one was tight and I had to use a gear puller to break it free. Split pins are a little work to get into the recessed castellated nut when you put the engine gears onto the Slick mags. |
|
| September 2010 | ||
| Install MicroAir 760 radio Picked up a 2/1/4" round comm radio. Installation was inspired by Steve Wolf's S-1, at an angle under the instrument panel. Decided to make it all one piece with the avionics switch panel. Good opportunity to clean up my scabby wiring job at the same time. Here's the panel, carved out of .064 (had a piece laying around, otherwise would have used something thinner).
|
  |
|
Close fit at the back to the Pitts fuel tank. Wolf had moved the dash back a couple of inches. Changed the antenna connector to a 90 angle, and shortened the 15 pin plug (could have used an angle 15pin there too). And installed with an after picture....... |
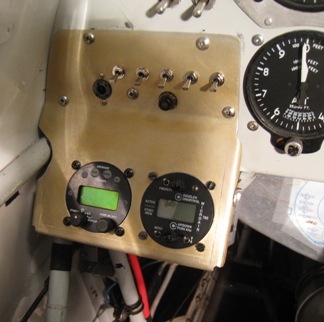 After all that it looks ok, but I wonder if just the transponder and radio in opposite corners under the dash may have been simpler. 'Way too much time on my hands. |
|
|
|
||
| 2013 | ||
| May 2013 Radio and Prop Radio not transmitting, bench checked fine - traced the problem to a bad solder on the on/off switch. Prop overhauled, hadn't been done for about 20 years. kept it at 76-62. Had thought of going with a Catto three-blader in prep for a Wolf cowl, but hey ho, just gas and oil for now. | ||
| Nov 2013 Adjust Horizontal Stabilizer Rain started in November, decided to tackle the nose-down trim situation by raising the leading edge of the horizontal stabilizer two washers, something I'd been avoiding since thinking about it in 2007 due to the grief of trying to do this blind, with tight bolts, through the inspection covers. Decided to add two washers, 1/8", which on the 22" arm would be roughly .4 of a degree. Incidence was at 1 degree before, this would bring it close to 1.5, spec is 2 degrees. So, removed the horizontal stabilizer to "unload" the front "H" tube, then got in there and pulled the two AN4 bolts, stacked the washers and wrapped them in tape to hold them together, then slipped them into place between the two pipes. Test flew it and still some nose down trim required. Well, I'm good at this now, so I took it all apart and put in another couple of washers. Raised it .8 degree total. Slight nose down (trim tab up). |
||
| January 2014 Let's really check that wing rigging! Post
stabilizer adjustment gave a heavy left wing. Instead of just
fixing that I decided to ground-zero the wing rigging. Made
up a three rigging boards, bought a pencil laser and a new digital
level. Found the top wing bowed up and nothing left for
adjustment on the landing wires. Can't believe it's been like
this for 30+ years, t'hell kind of a re-rig did I do in 2008?
Turns out the upper wing rear spar attachment plate was built
incorrectly and the wires were at their limit of adjustment when the
I-struts were extended to reduce the dihedral. New fittings, new
I-struts or new wires or....made up some 0.9" wire extensions from
.0.194" 4130. Here's the stats: Aircraft leveled laterally and longitudinaly using upper longerons in cockpit. Horizontal stabilizer, +1.3 degrees (checked inboard and outboard, both sides. Top wing, AOI is 0 Bottom wing, AOI is 0 Bottom wing dihedral, 1.5 both sides I guess it is set up like a real competition aircraft. |
||
| I
followed Doug Sowder's bible on rigging. Rigging boards on top
wing, levelled, tip incidence matching center. Tightened the
wires to 650-750 ft/lbs per spec, then tweeked the I-struts with
washers to get the tip incidence back. Re-adjusted the ailerons back
into trail. Now some test flights to check if the airplane flies
level with the ailerons centered. Removed the left spade and did a test flight, it would fly level with the ailerons in trail but rolled left on letting go, so I shimmed the right spade more nose down until if flew level. Then put the left aileron on and reshimmed/flew it until it was again wings level with both spades at the approximate same AOA. | ||
| Here's a close up of the little landing wire extensions. | ||
| Fugugly, but it worked, wings leveled at matching AOI and all the wires are in safety. The correct fix is to remove those rear plates and make up a new one with the wider bottom and the wire mounts in the right place. I'll do that next time I remove the wing. |  | |
| Here's what Steen sells as the proper rear plate. I may even widen the bottom out slightly to give me more adjustability with the wires | 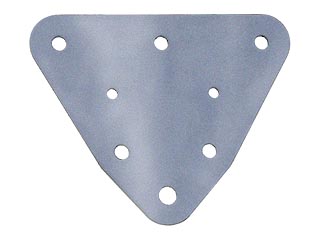 | |
| May 2015 | ||
| ||
| 2016 | ||
| ||
| 2019 | ||
| Tires, tubes, brake discs and pads. Bumped my knee one time too many and split the radios to each corner. Been patching that instrument panel ever since I cut a 3.25 hole instead of 3.125 for the airspeed. Might be time to start over with a blank. |
GOODYEAR FLT SPEC 500-5 4 PLY MICHELIN AIRSTOP TUBE 5.00-5 BNT9 RAPCO BRAKE DISC RA164-01700 RAPCO RA66-106 BRAKE LINING  |
|
| 2023 | ||
| Wolf Cowling Been meaning to do this since 2008. Spotted a cracked spinner backplate on the annual and decided it was time. First step was mounting and carving out the new carbon spinner. |
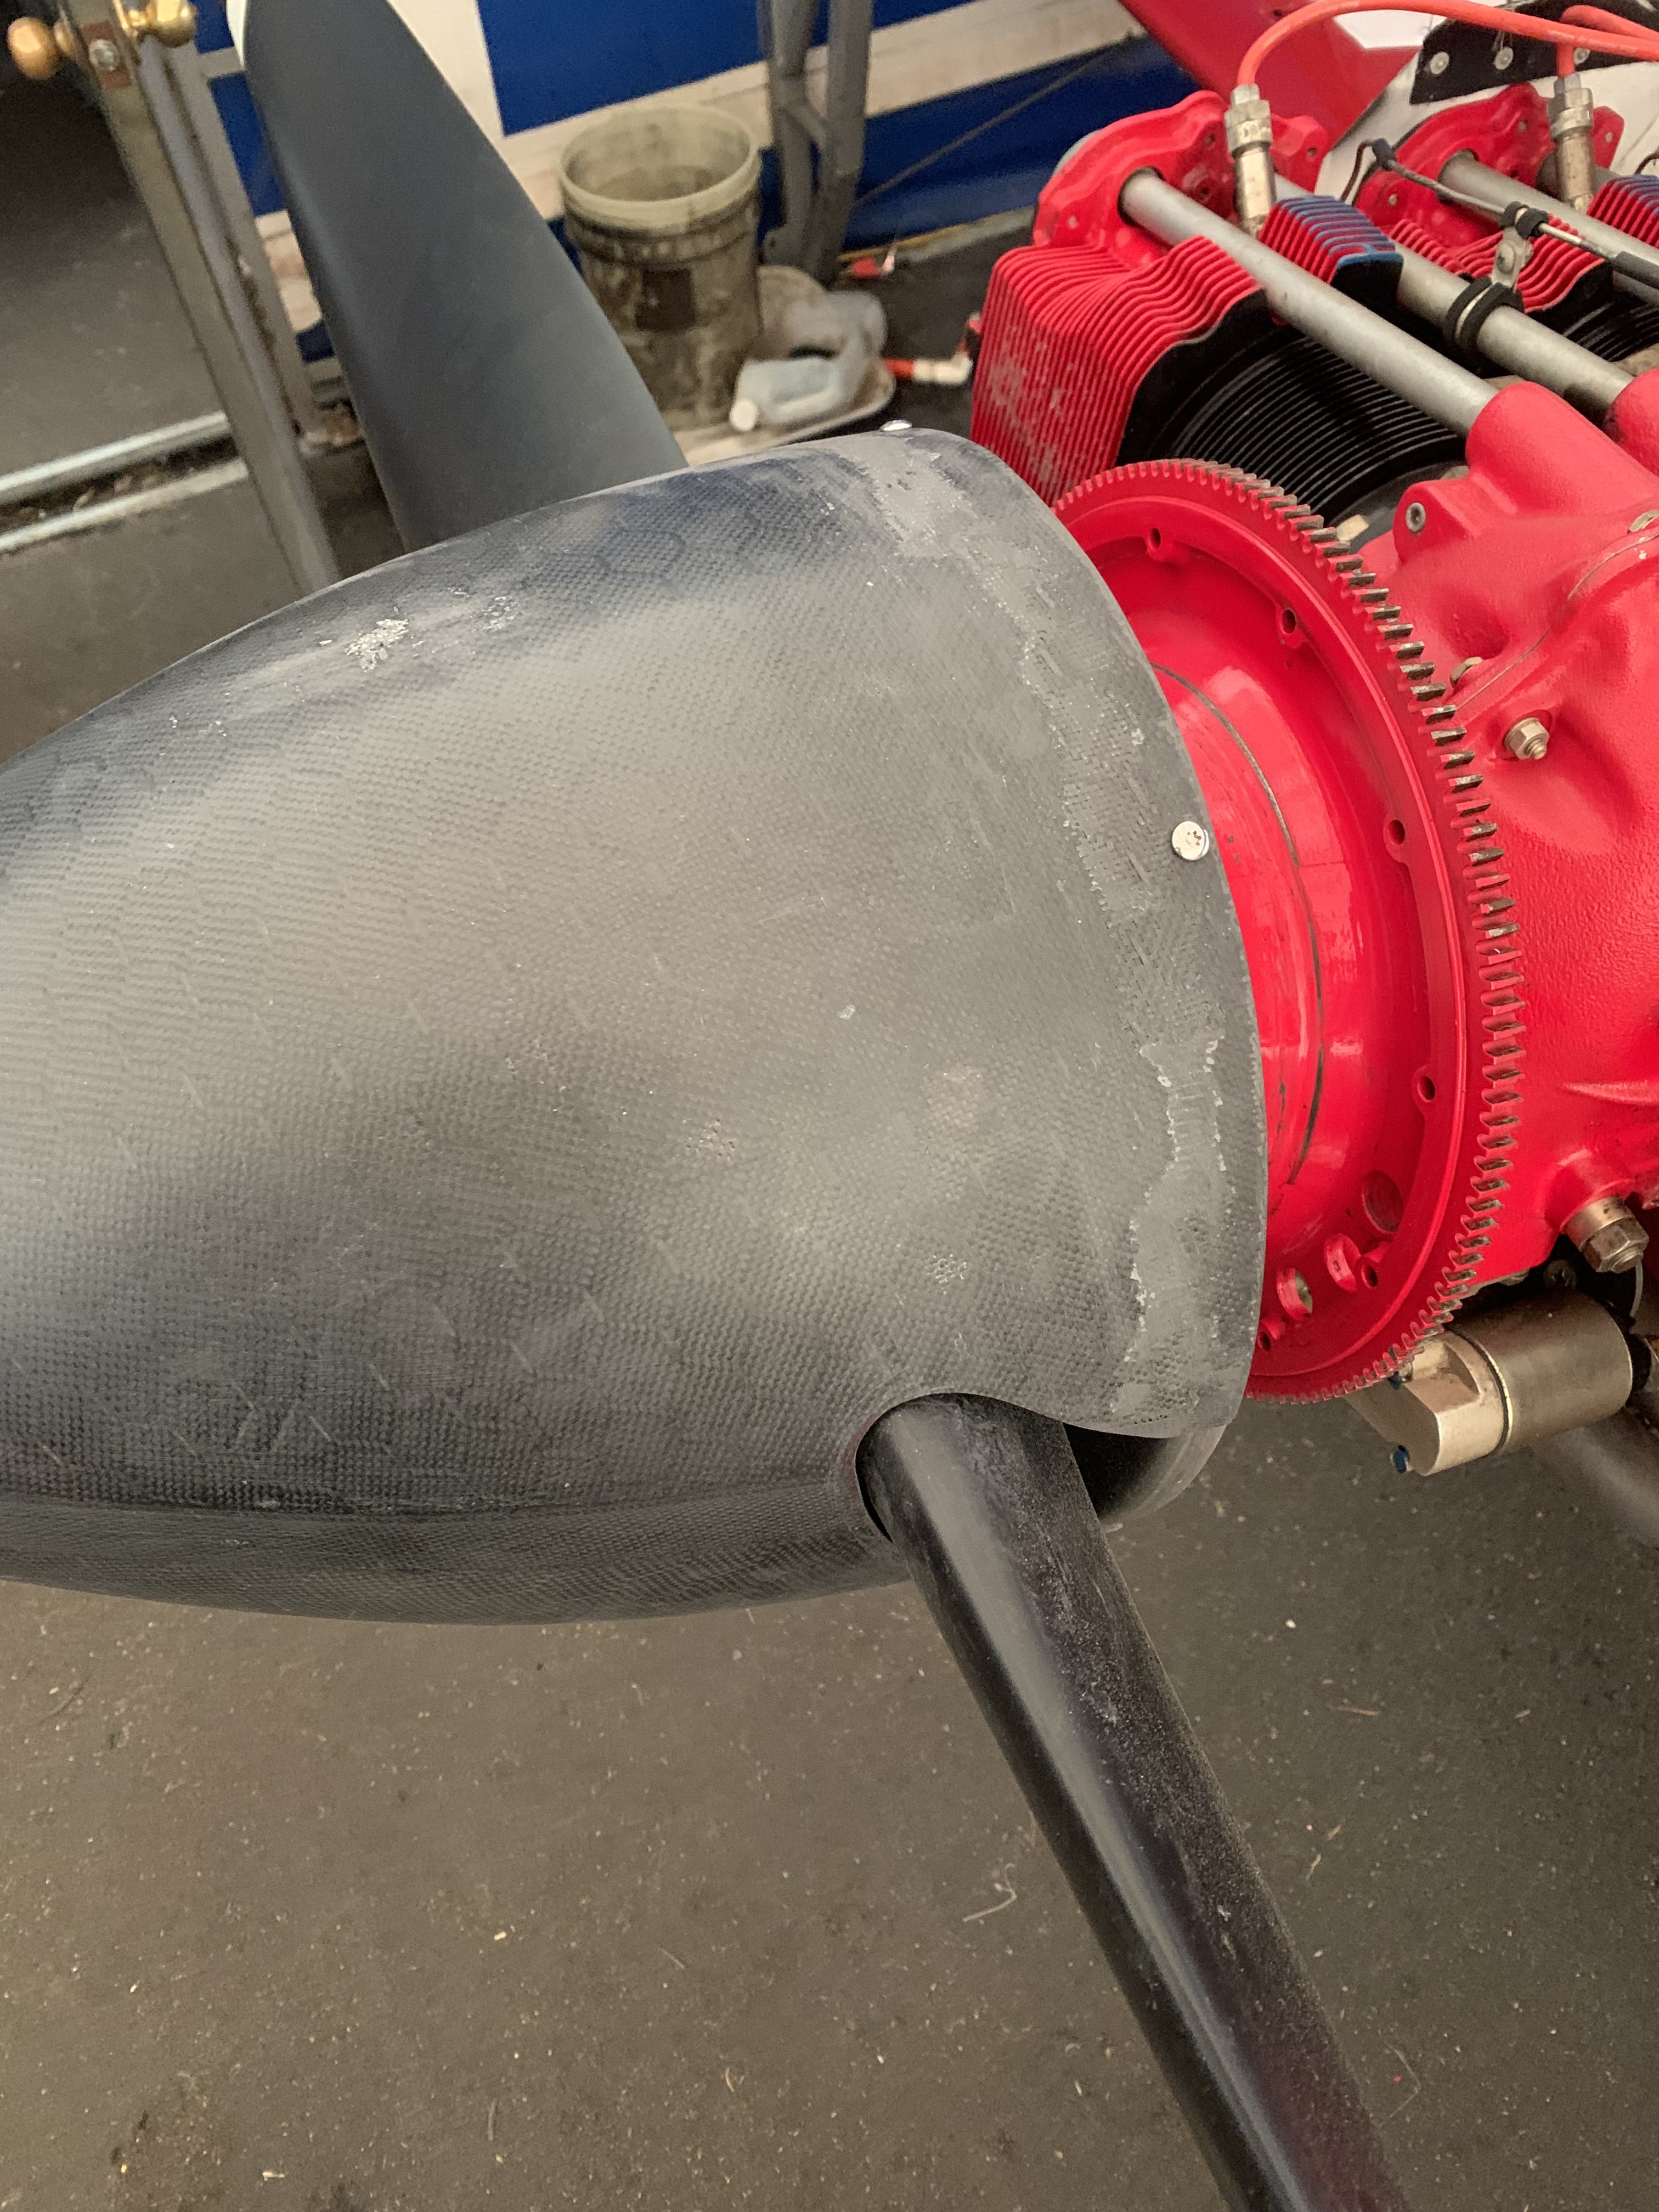 |
|
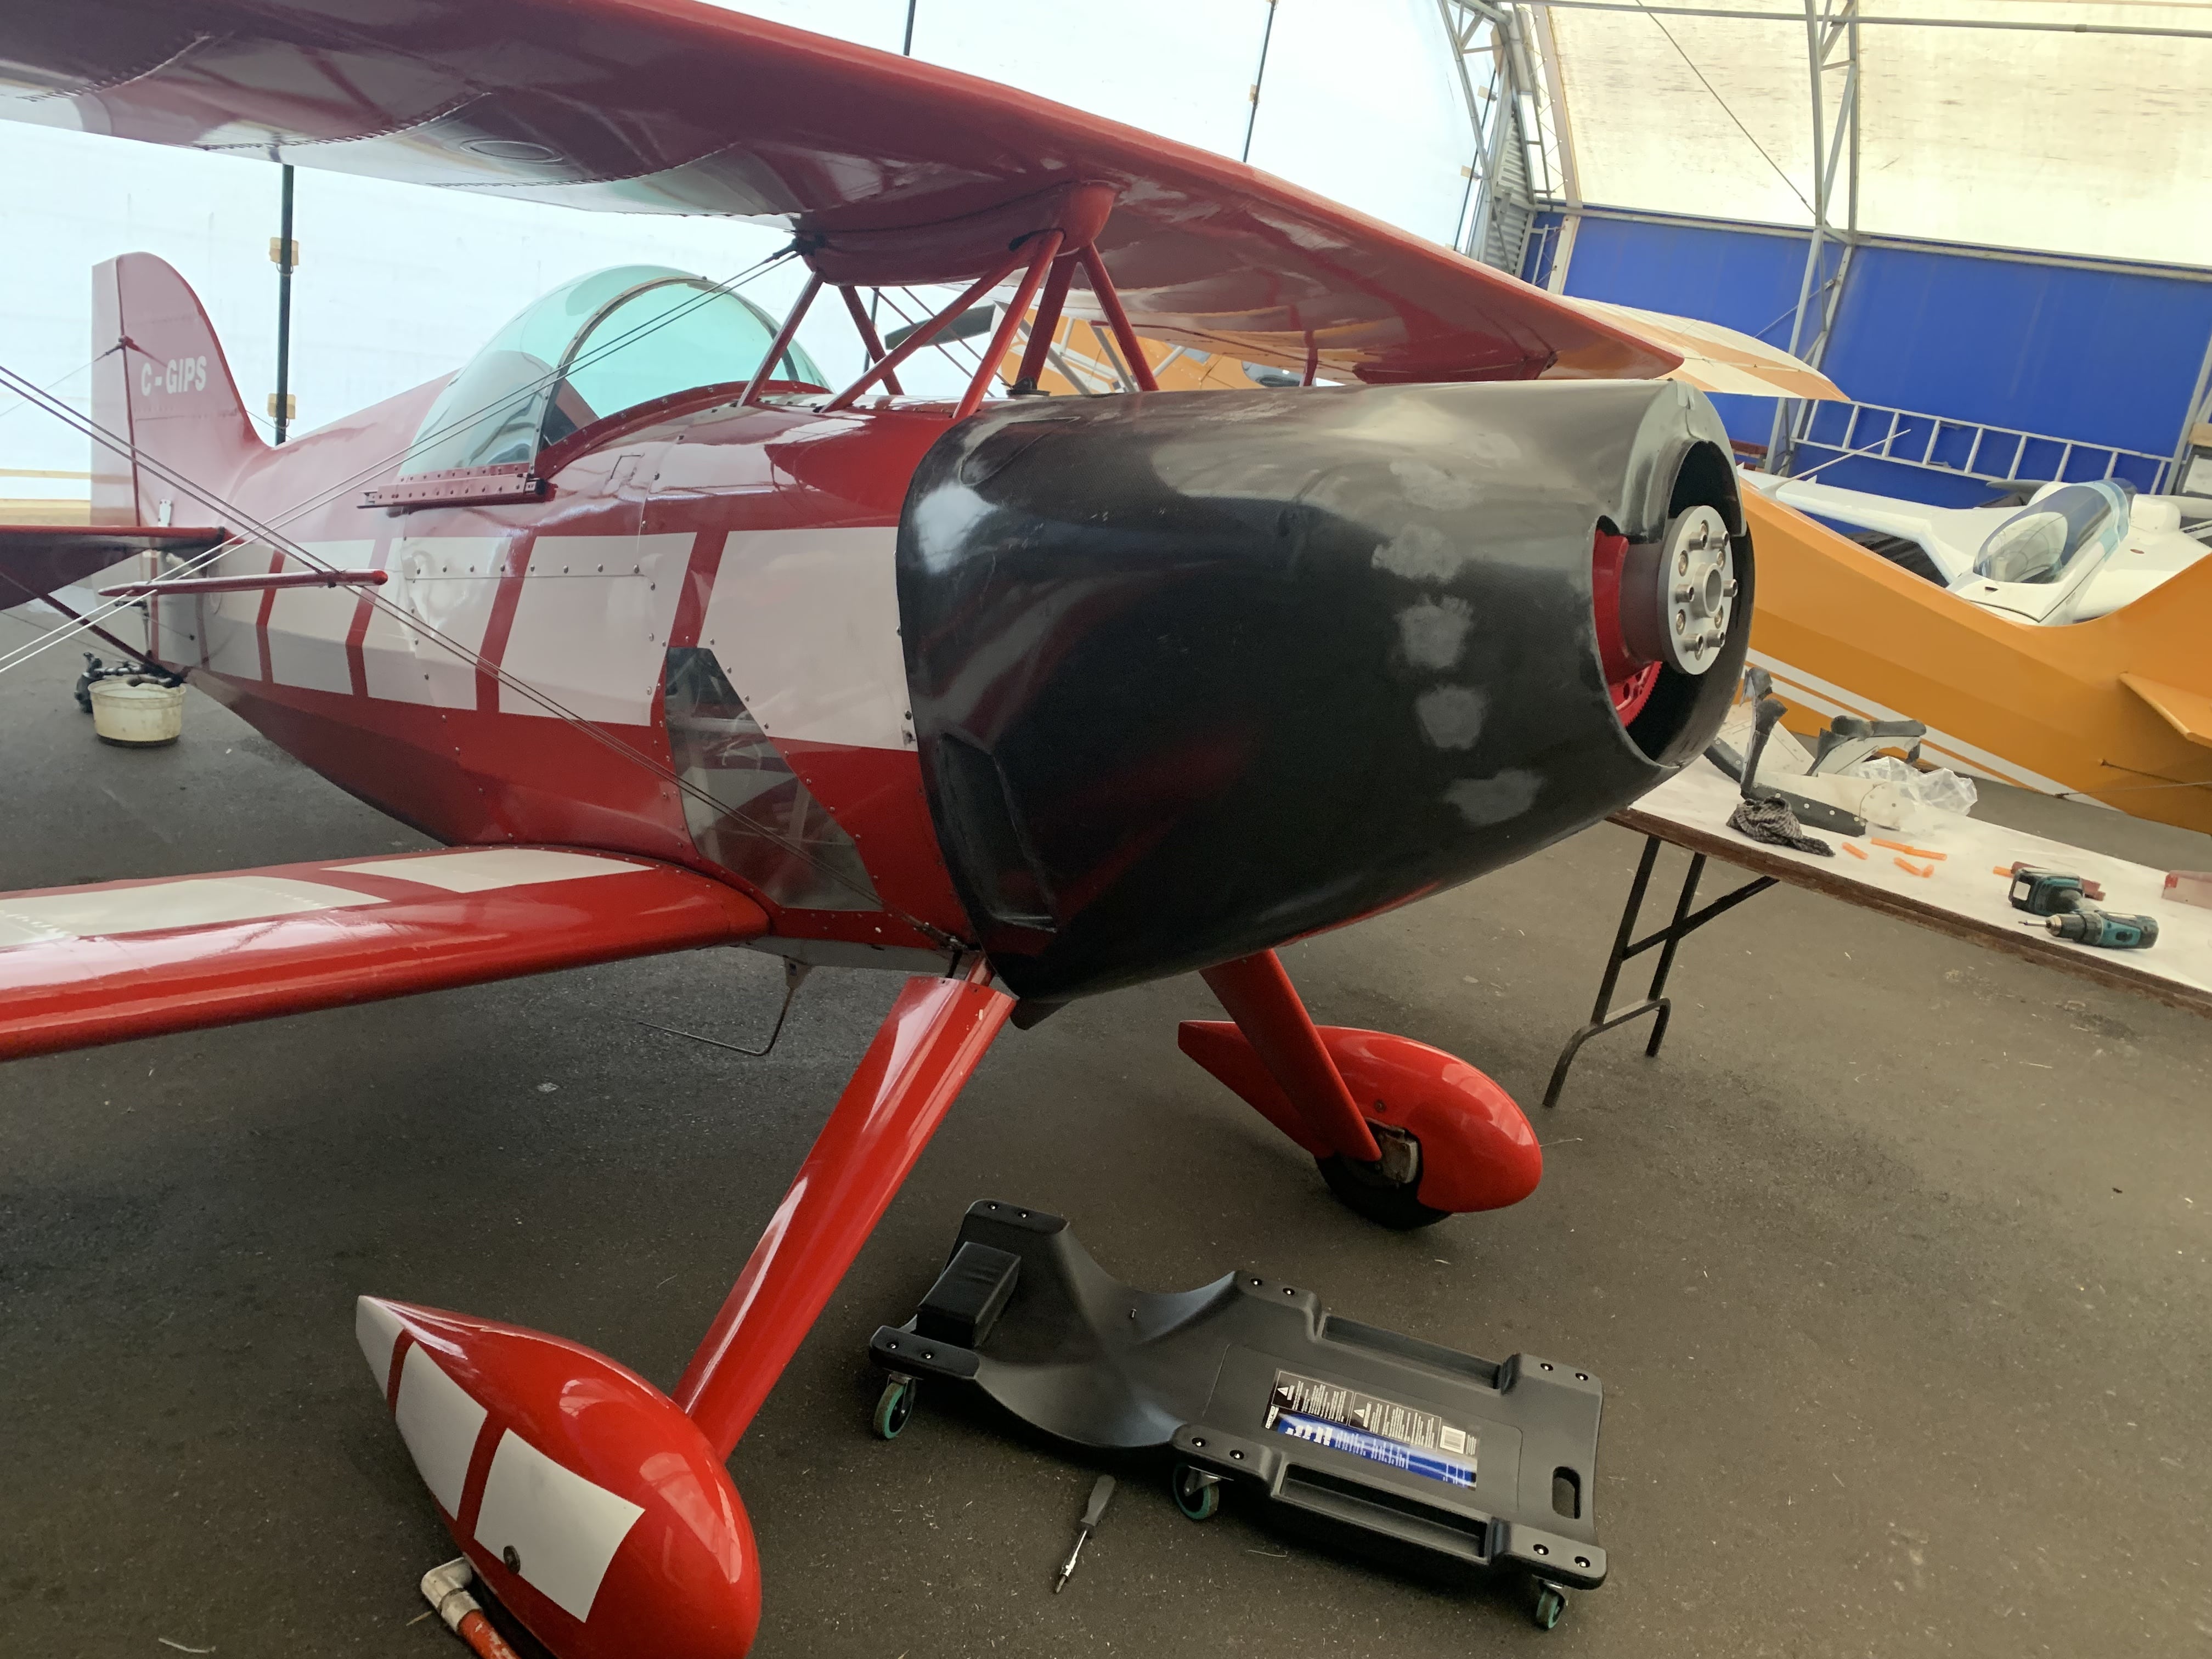
| Next
was fitting the cowling to the firewall, and lining it up behind the
spinner. Had to taper the upper and lower seam to get a good fit |
 |
|
| Then rivet and glue the two piano hinges on the top and bottom seam |
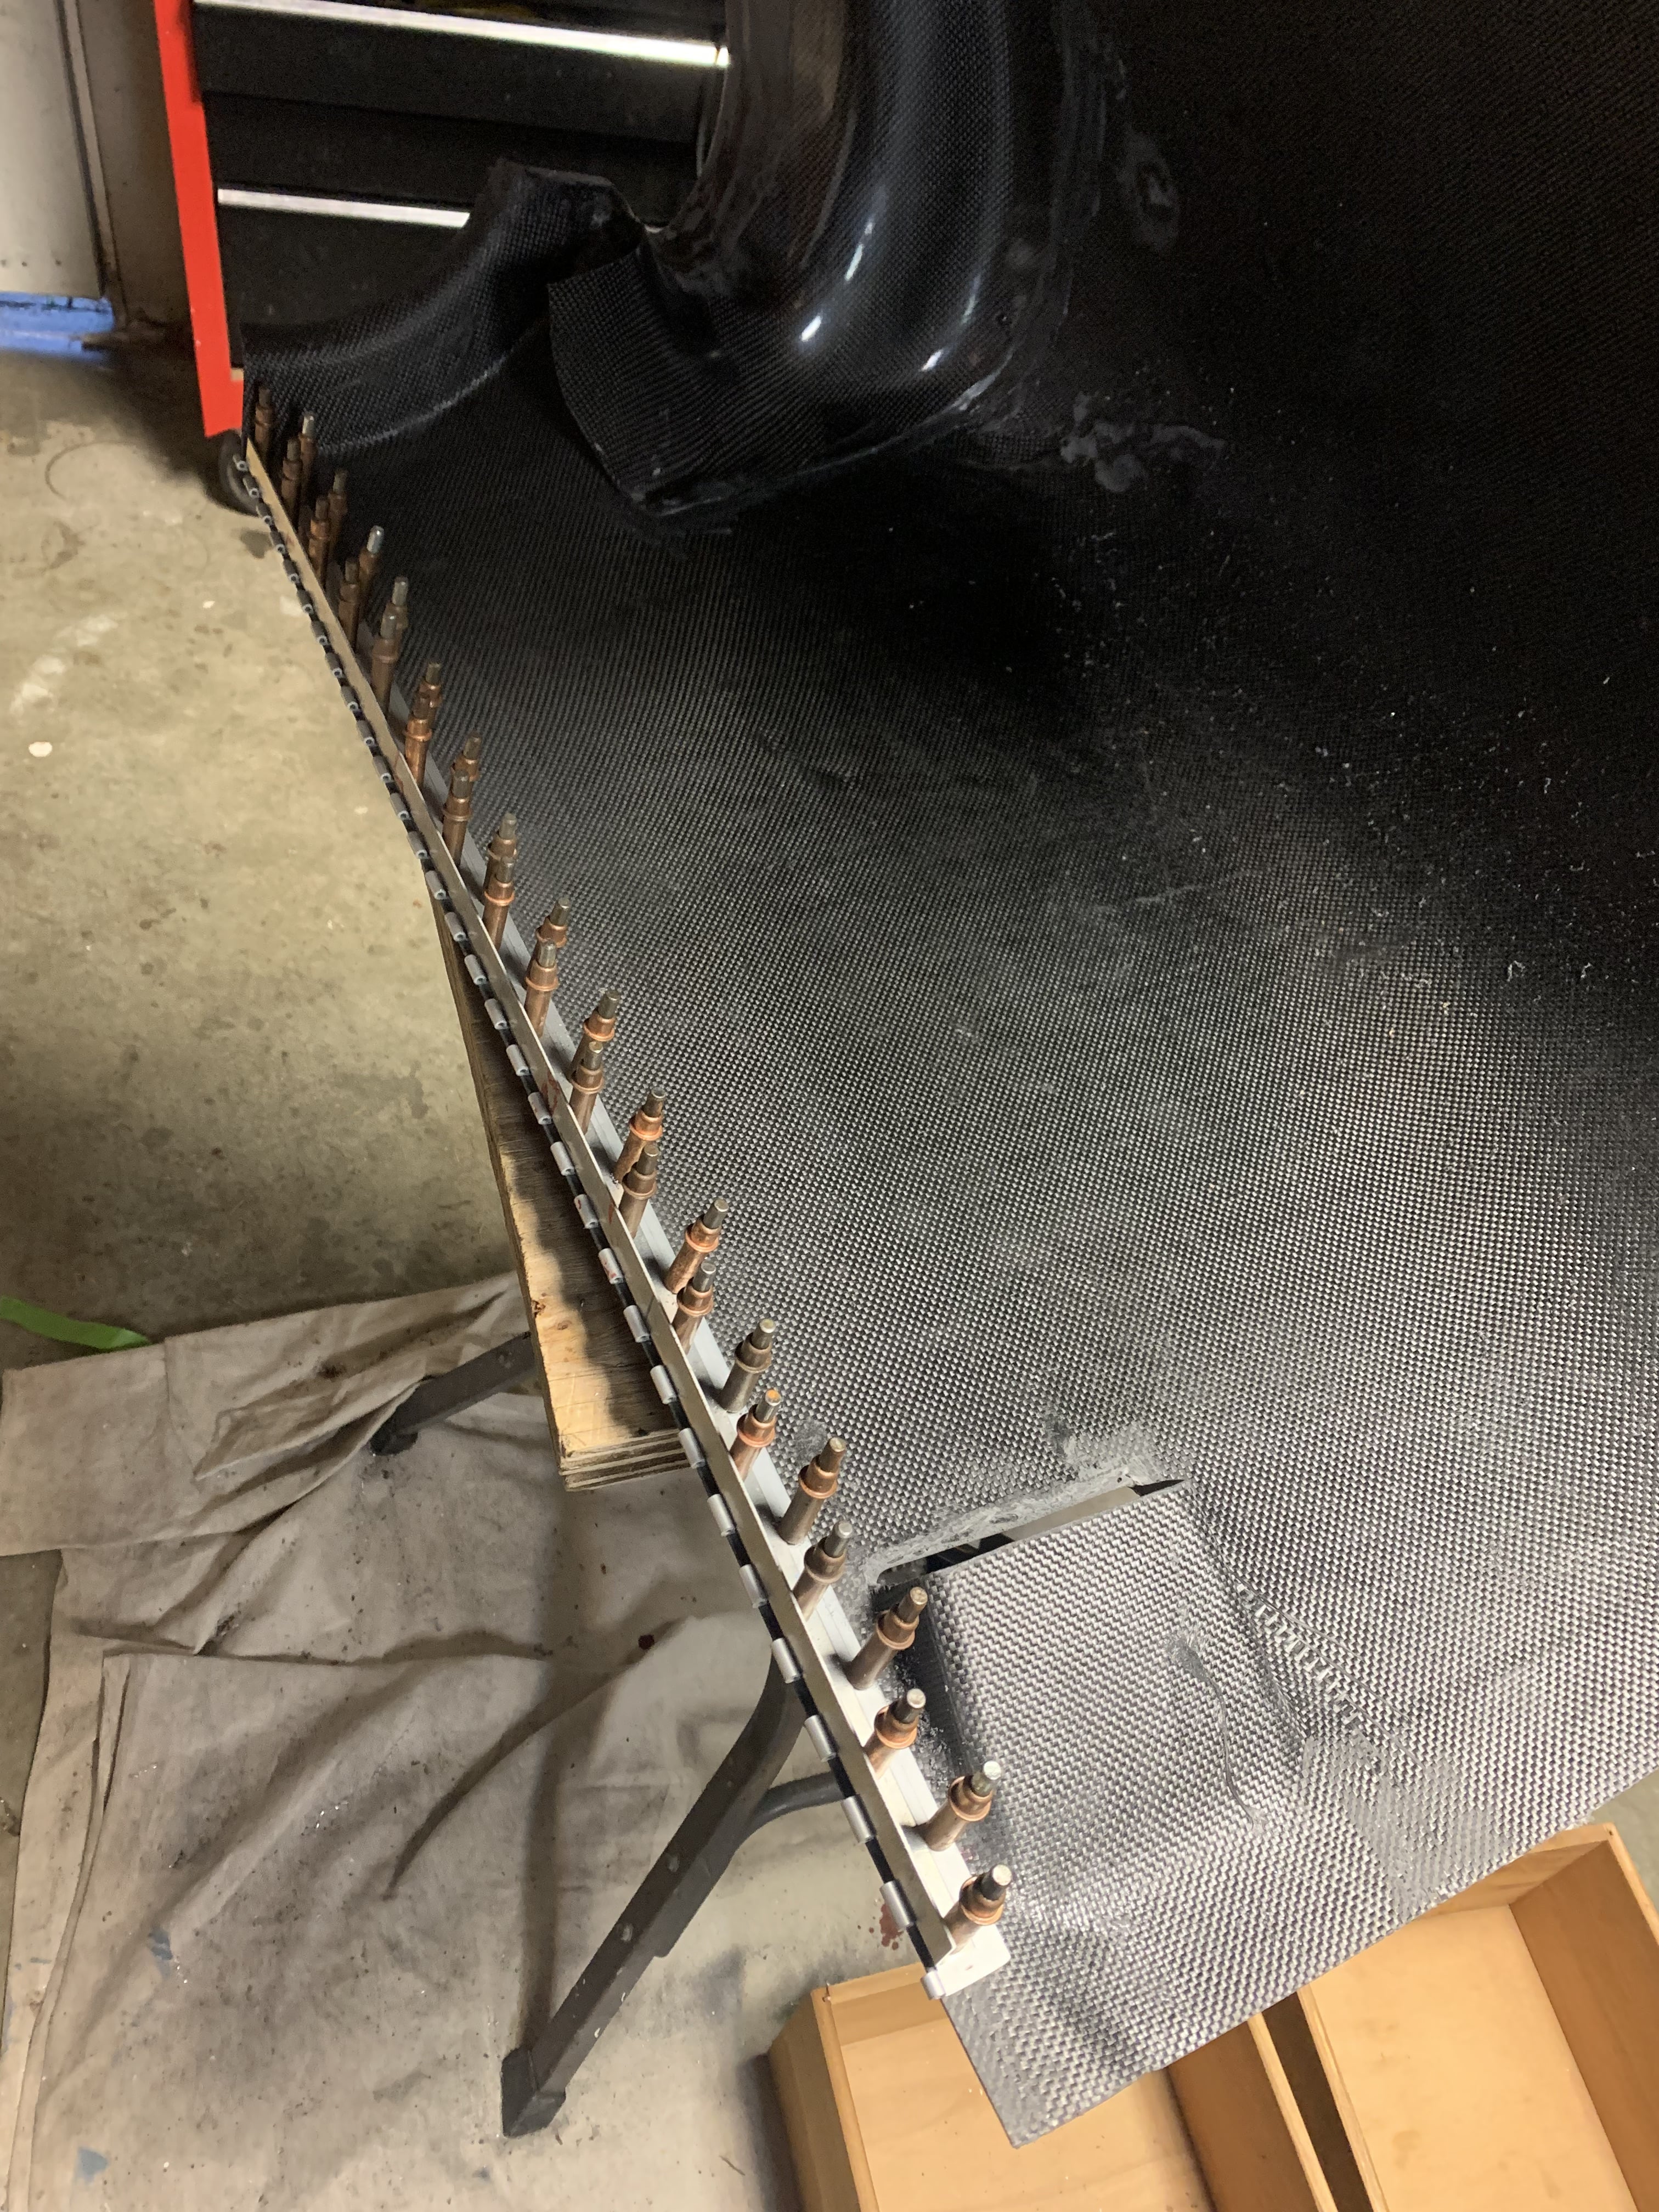 |
|
| Top and bottom seams done |
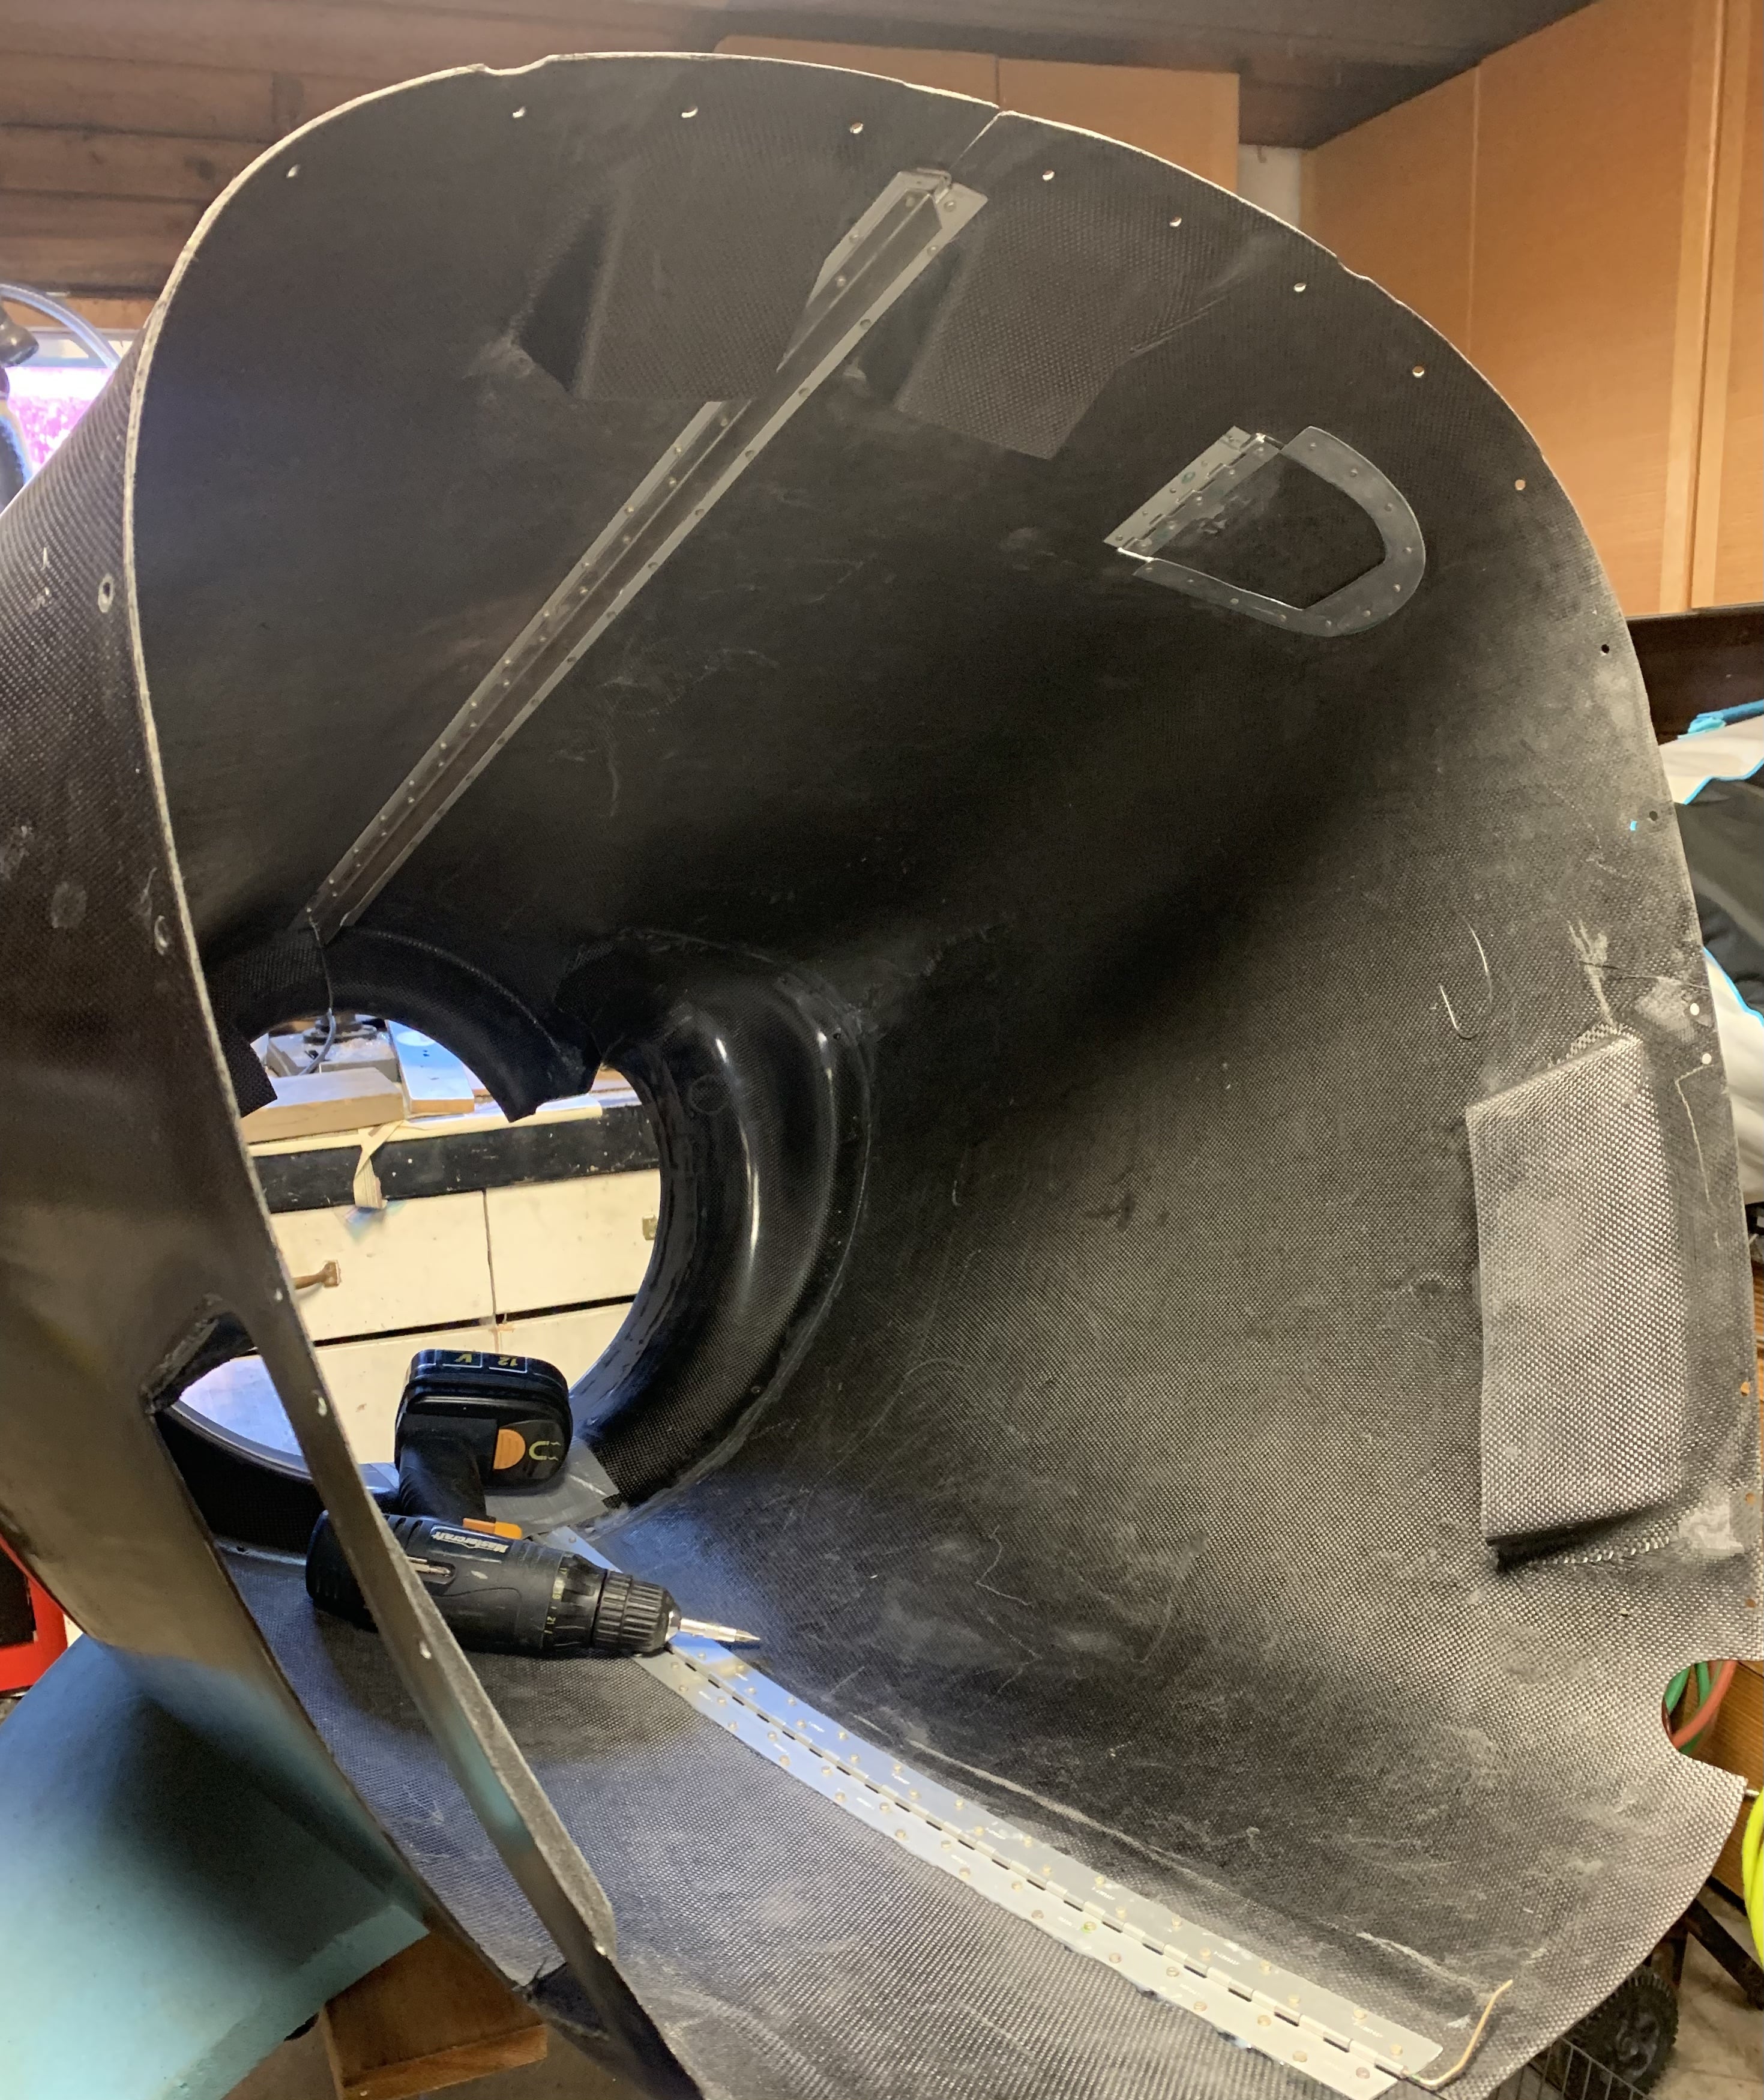 |
|
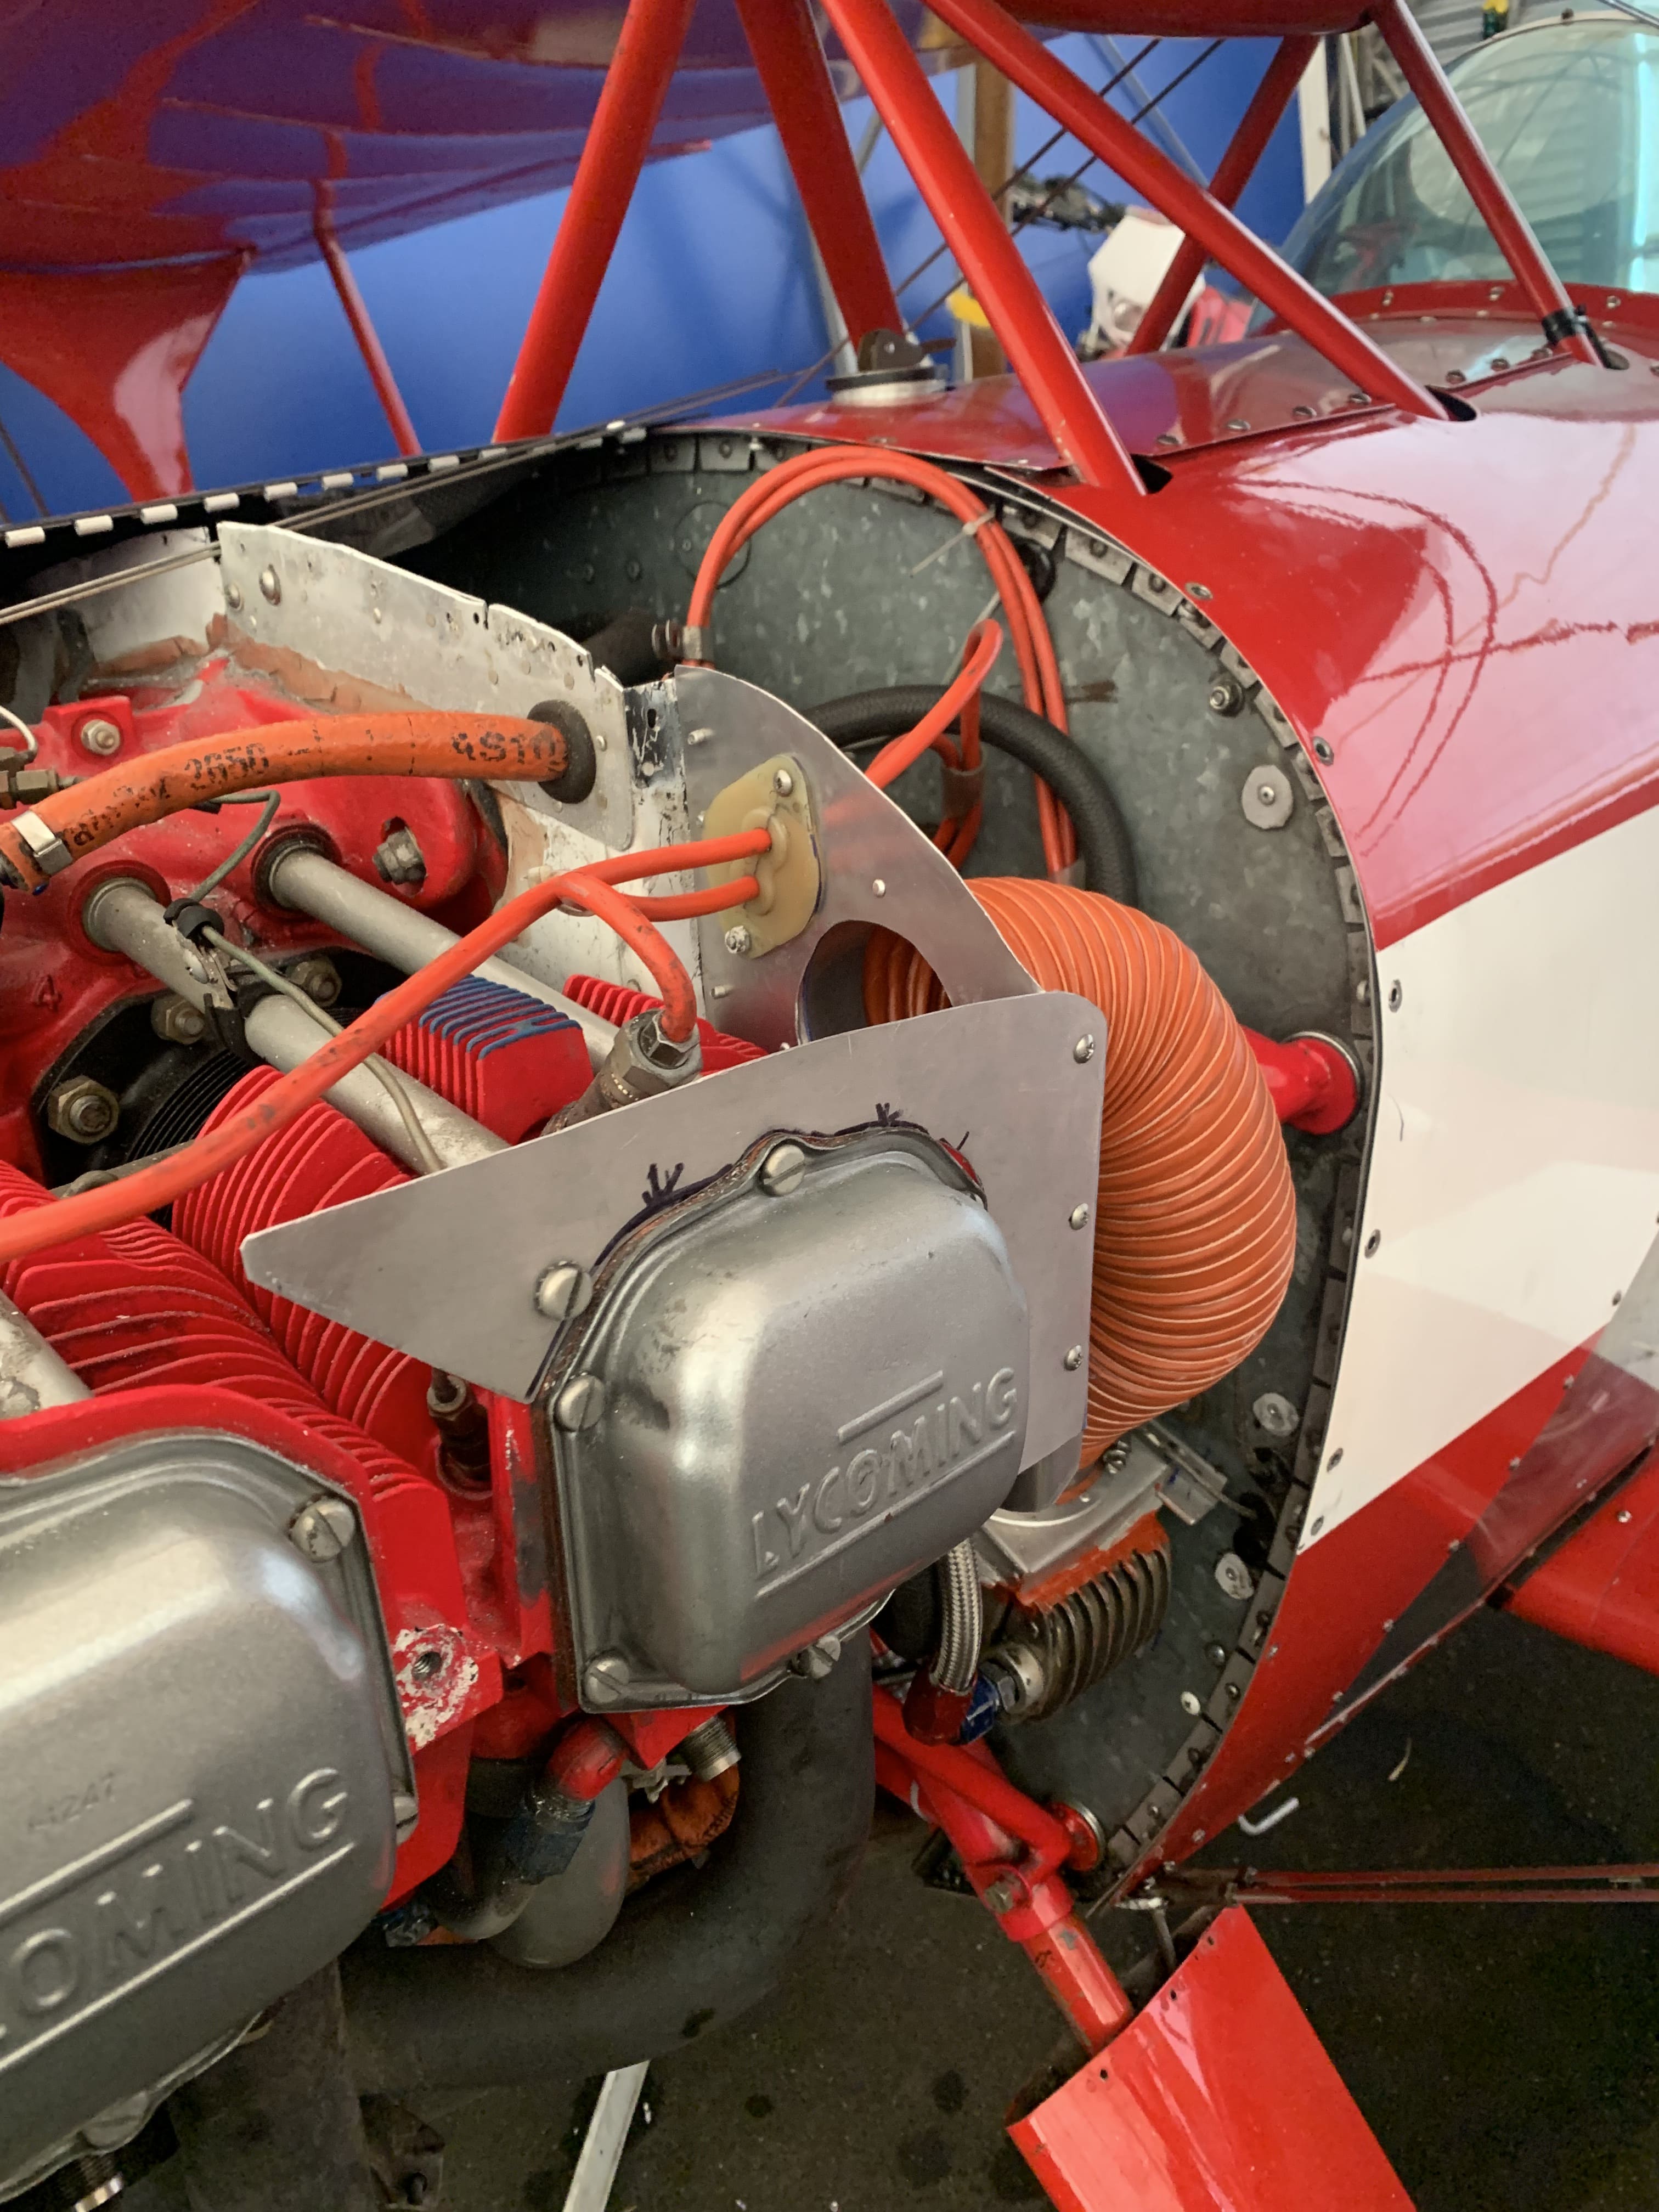
| Oil cooler has to move to the firewall. |
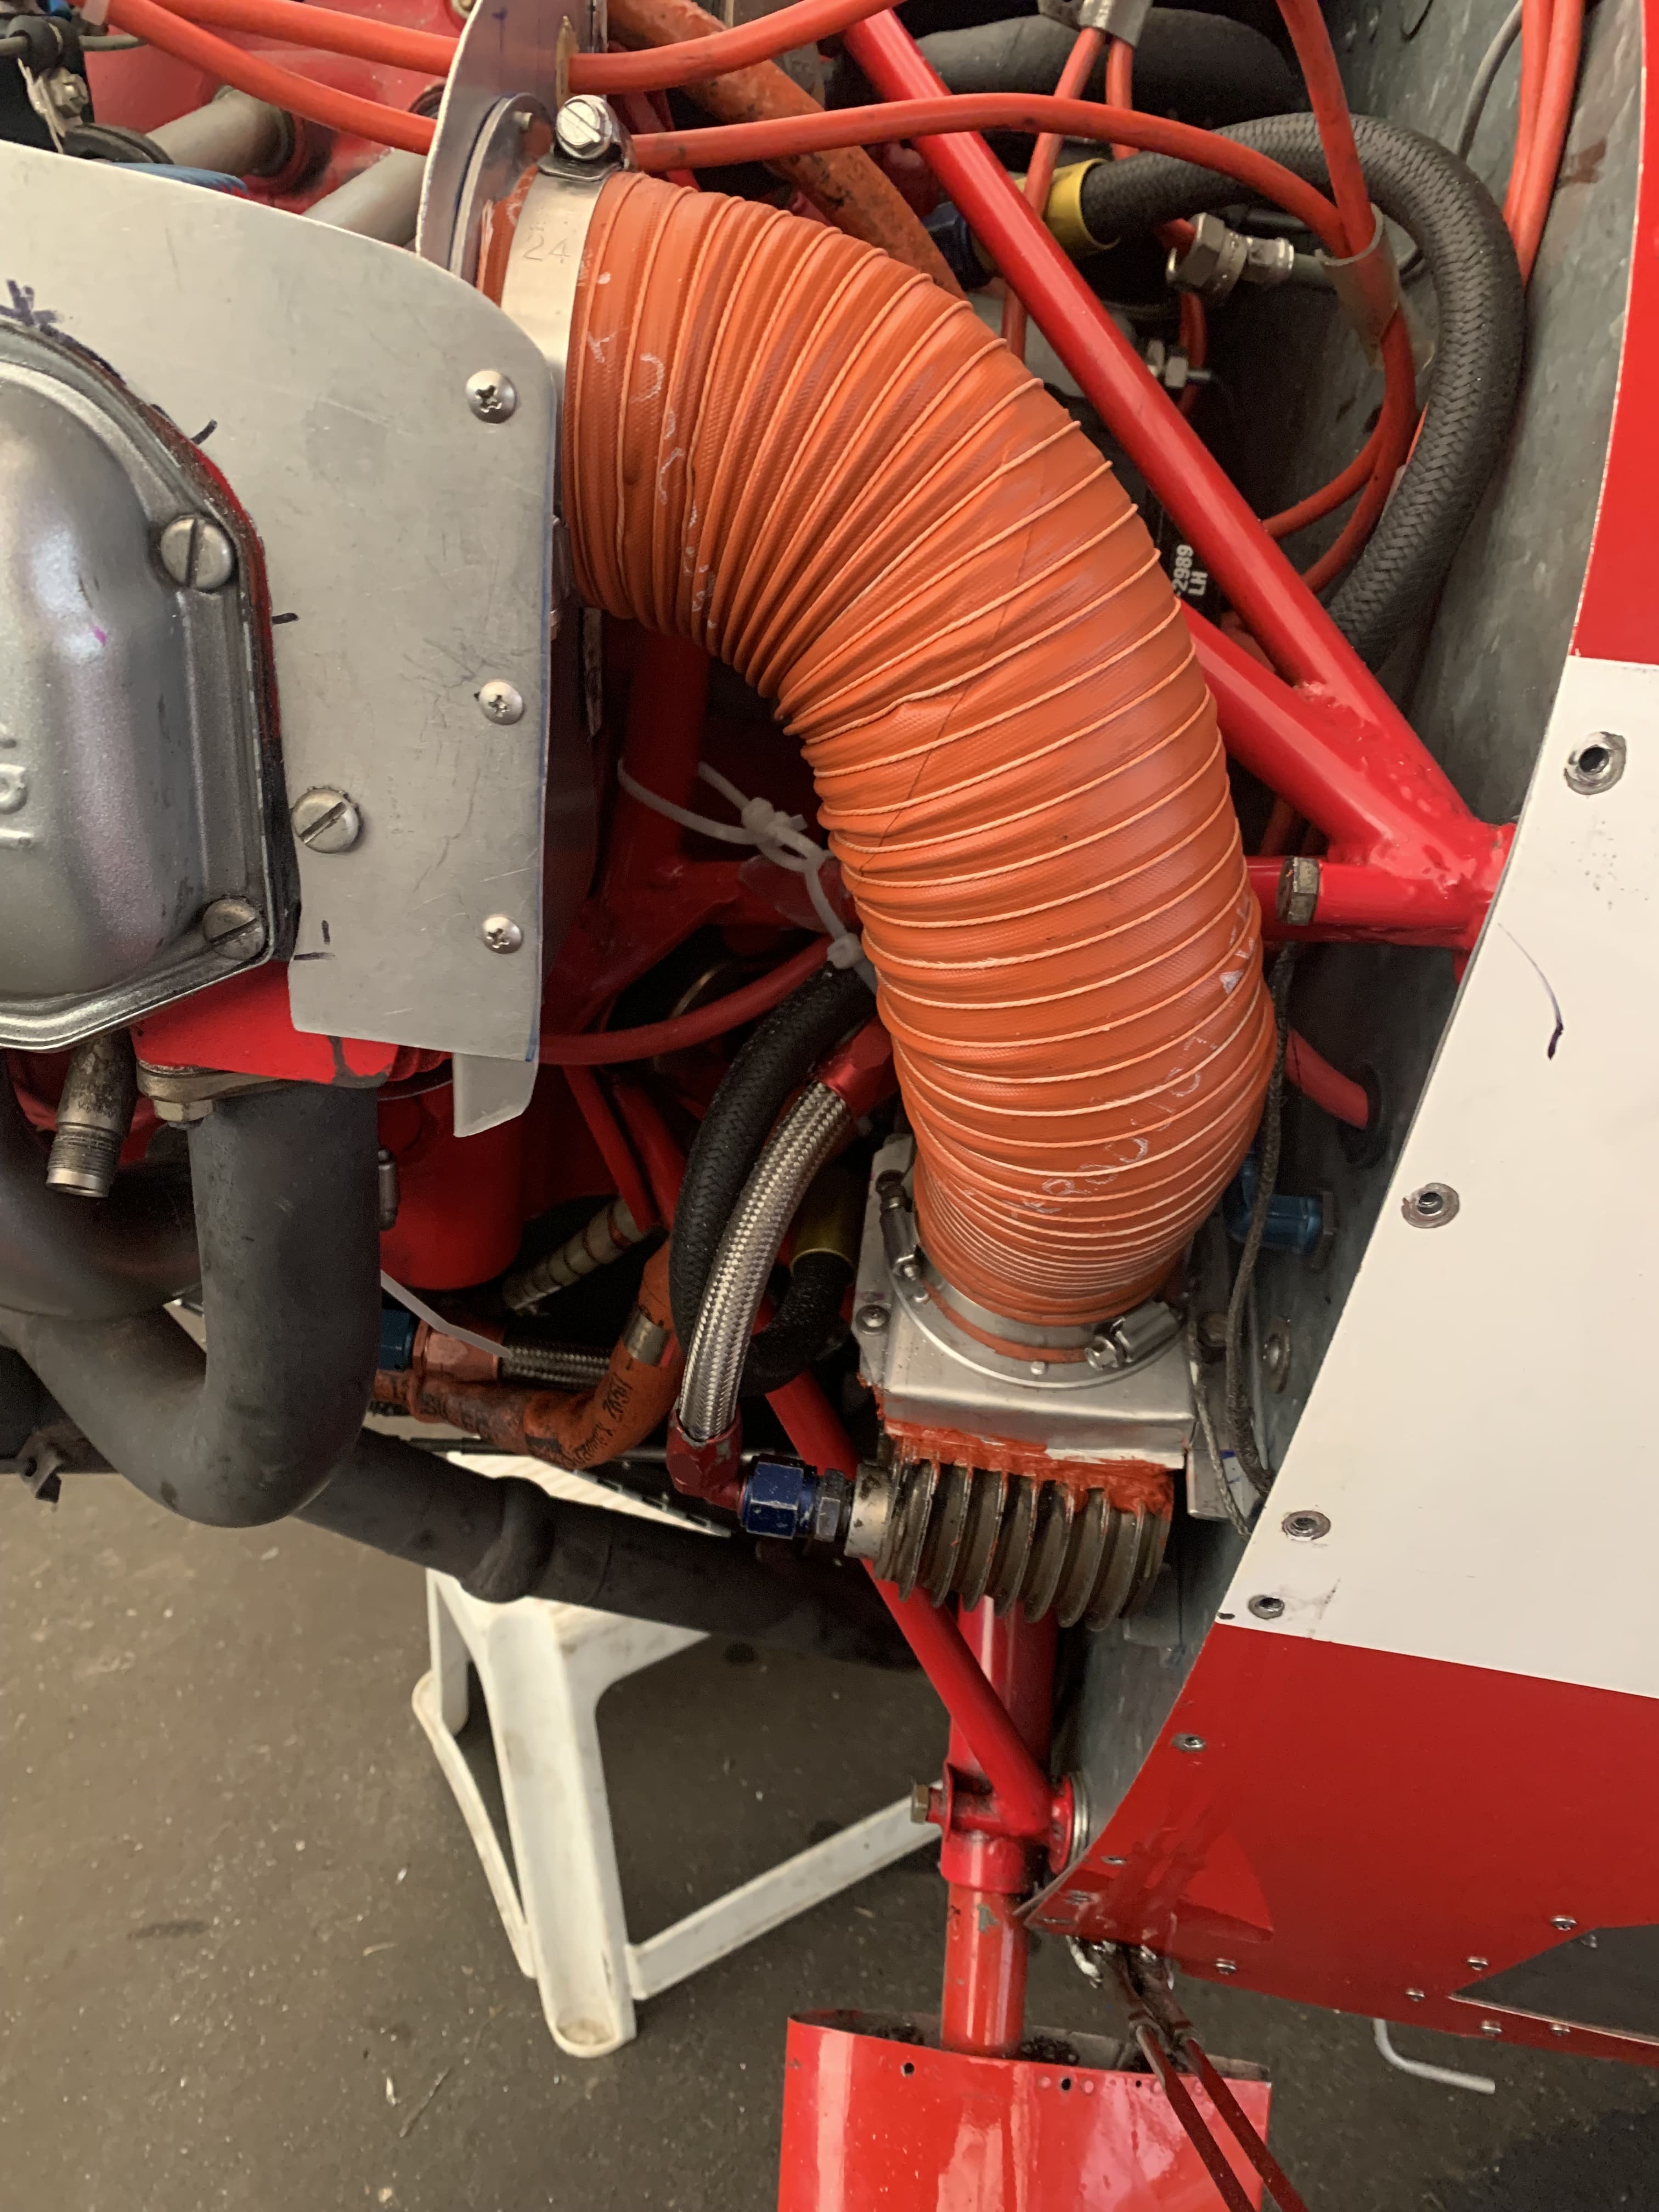 |
|
 |
||
| Copied Steve Wolf's original for an updraft Bendix and crafted up an intake box |
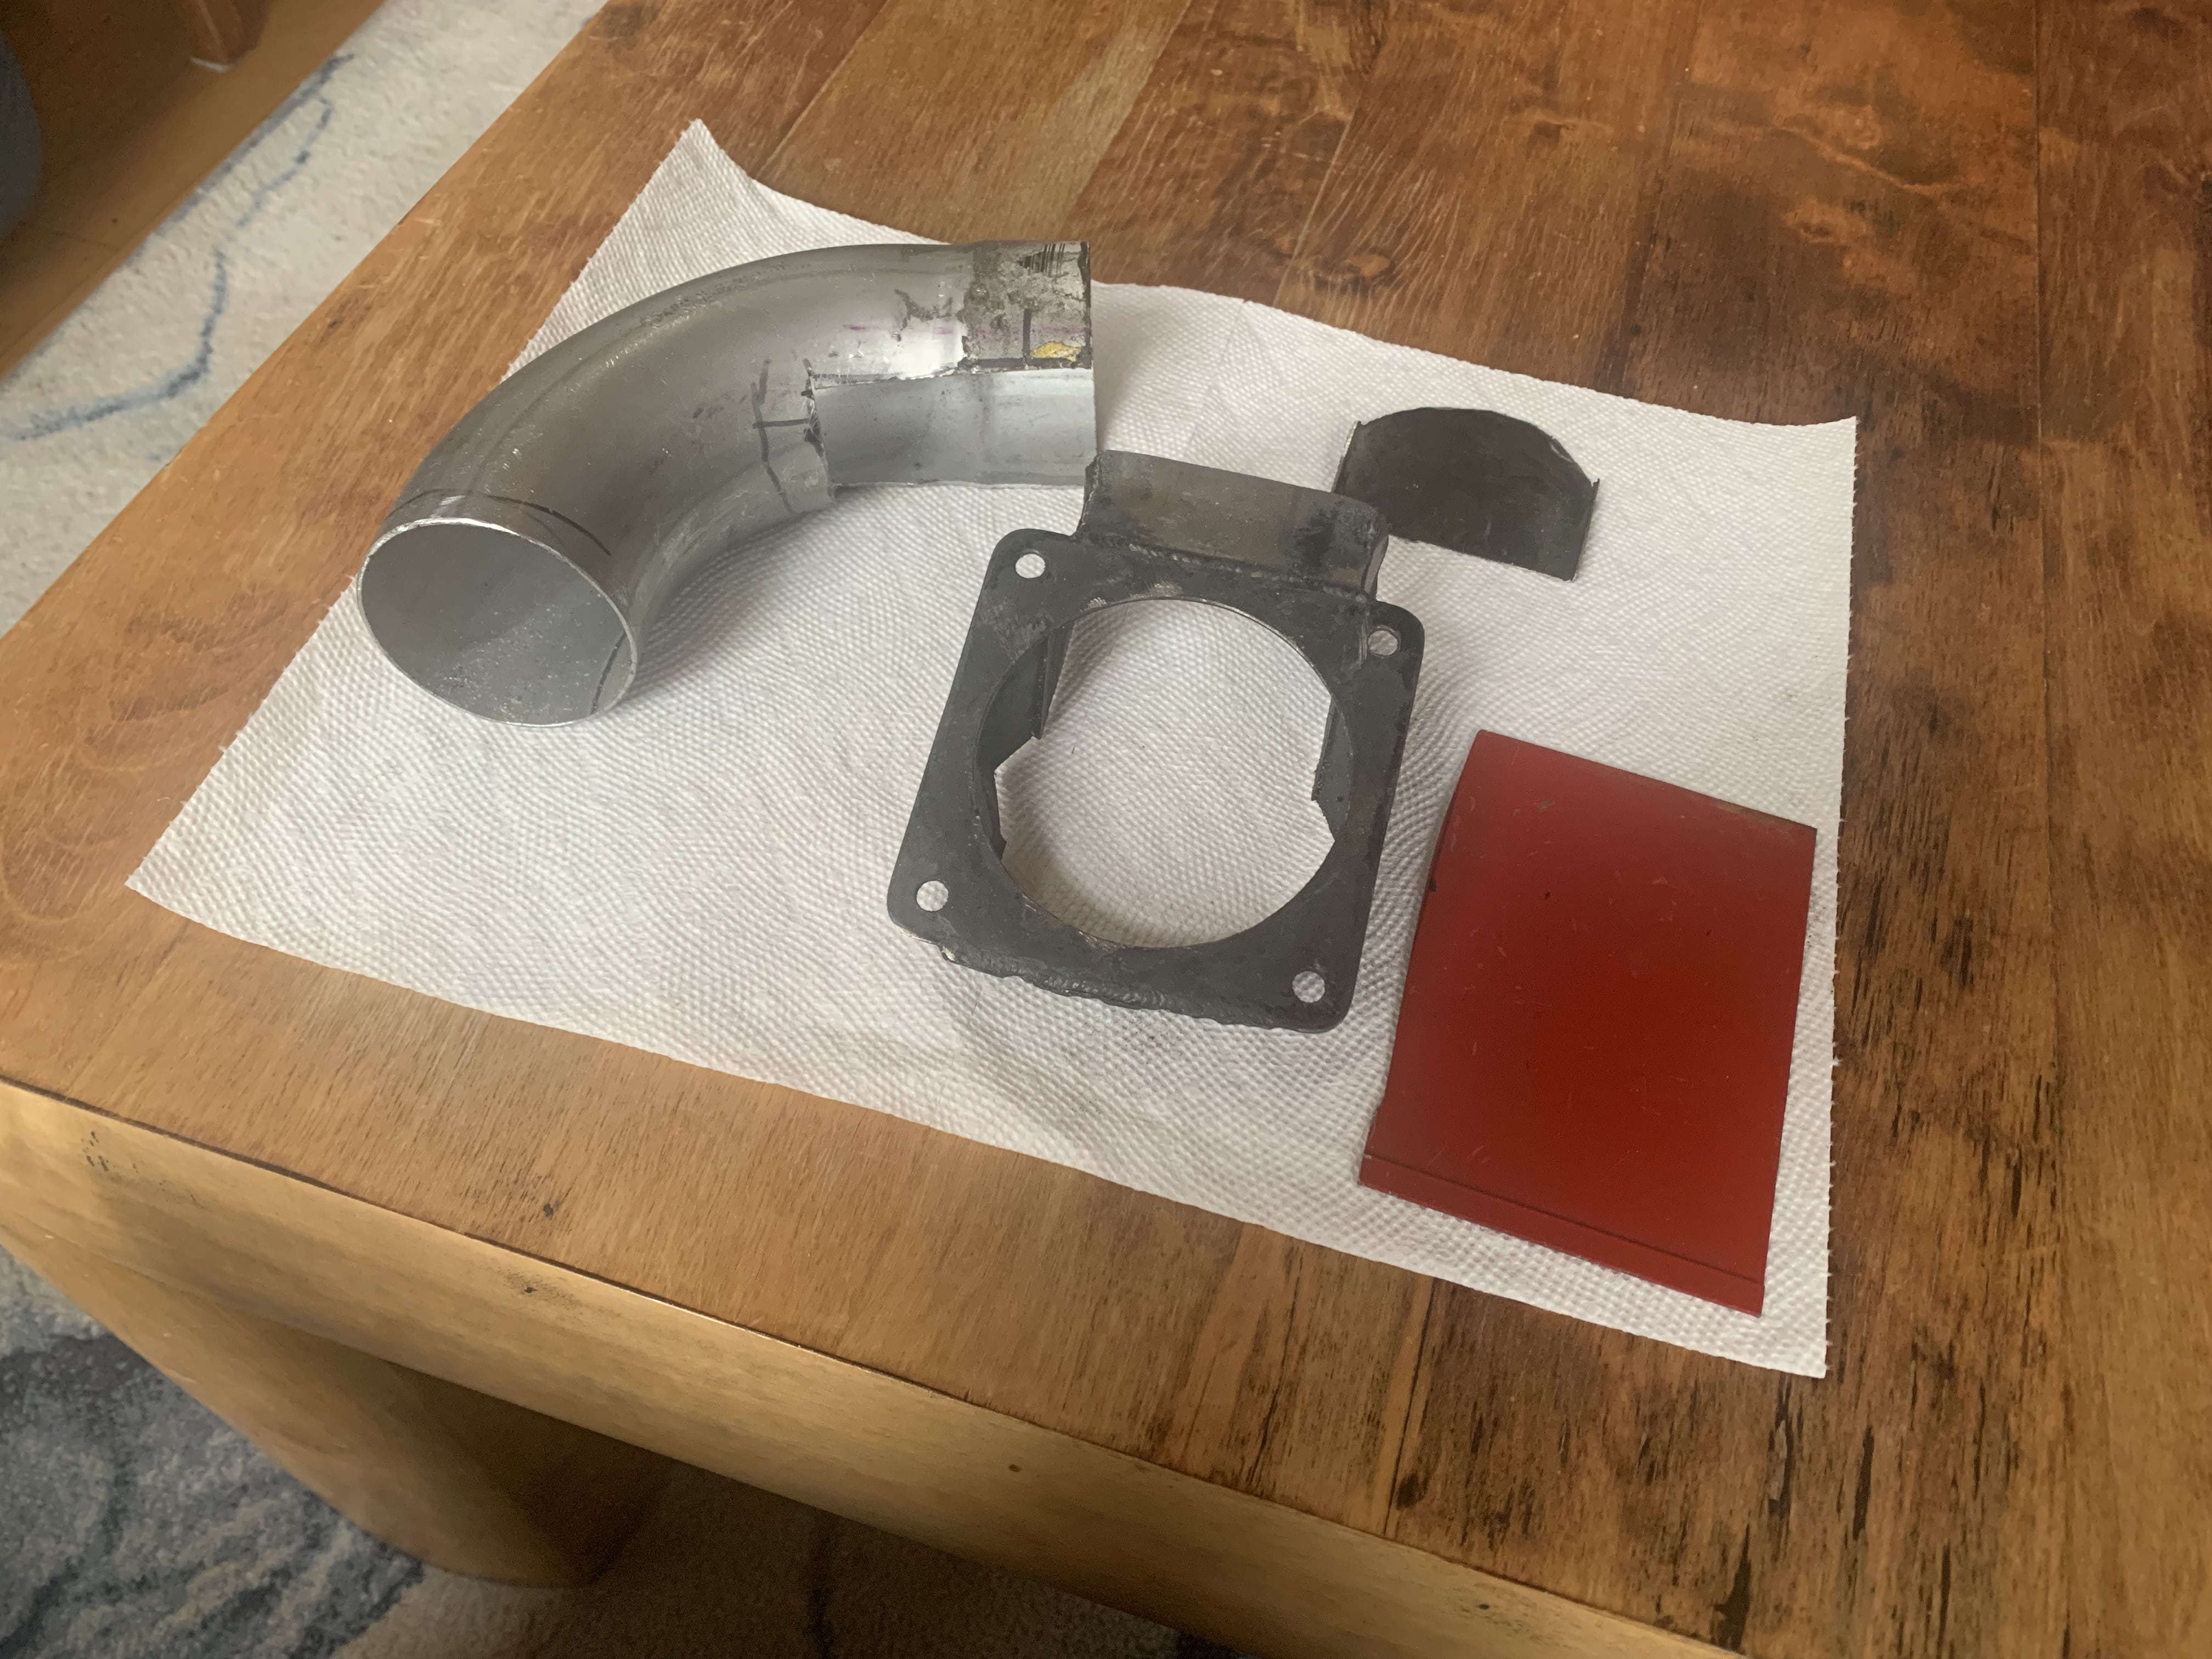 |
|
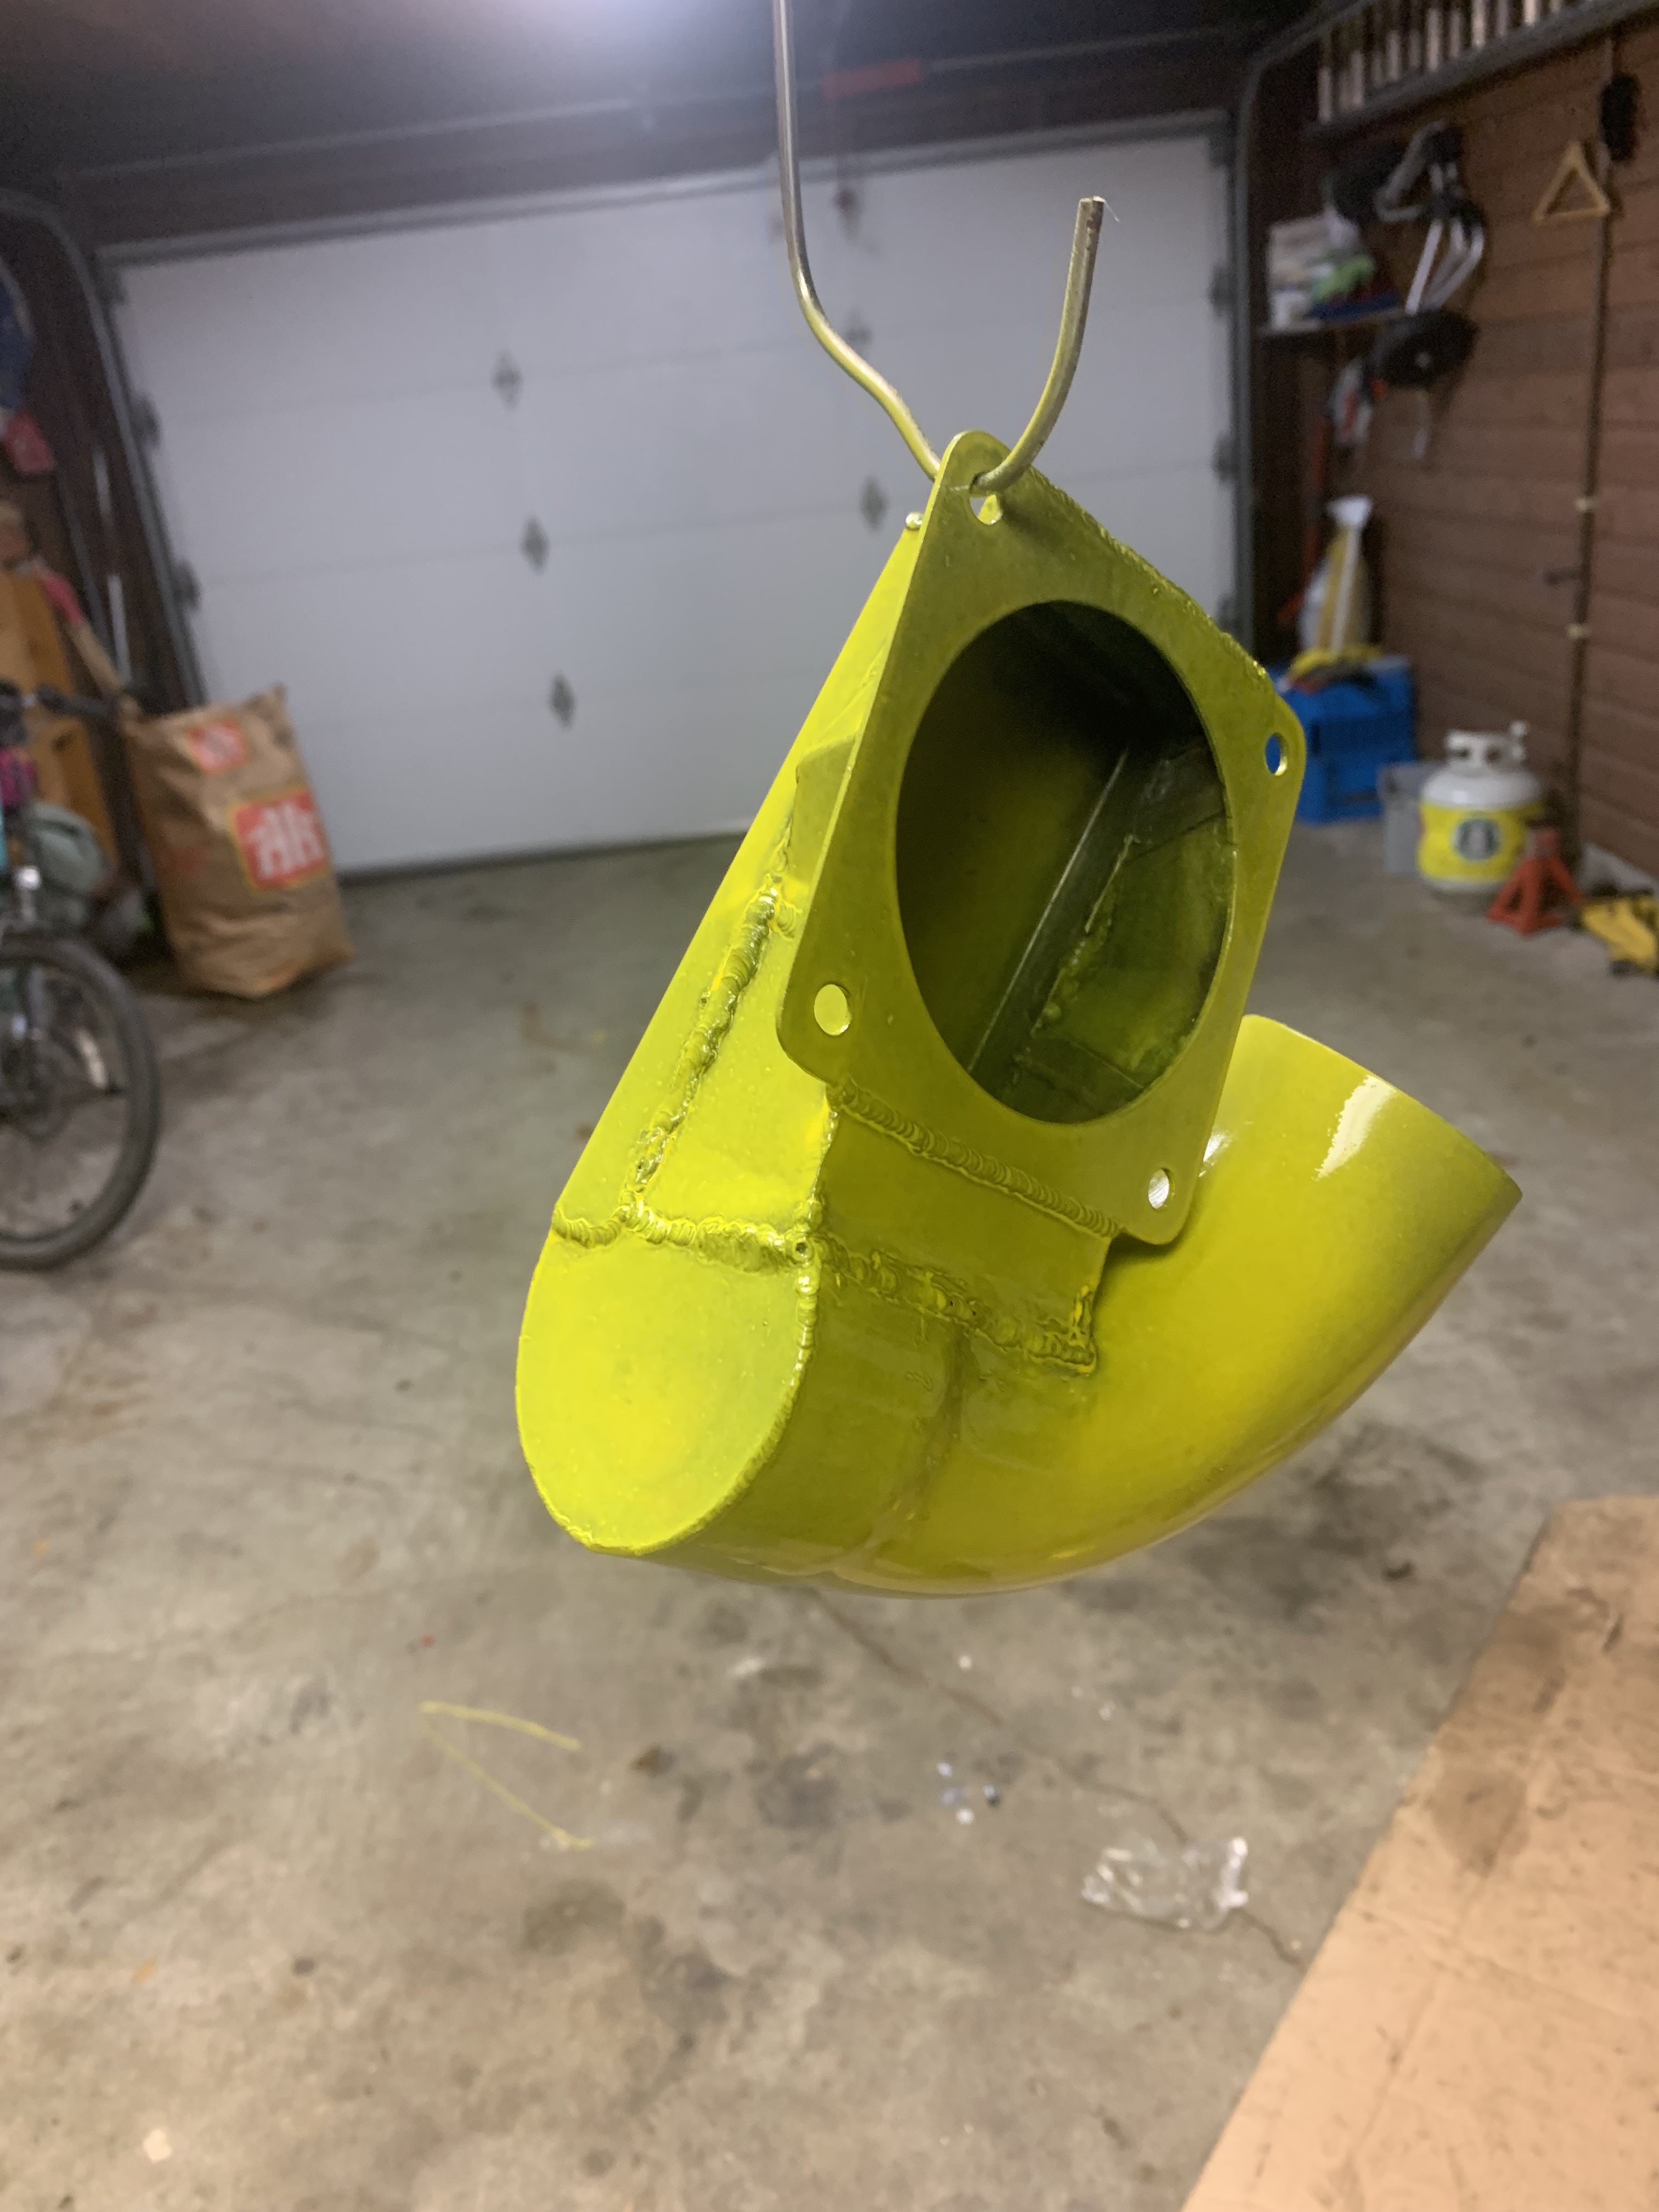 |
||
| Thought of just sticking a pipe out of the cowling, but that would have ruined/defeated the whole "Wolf" look. |
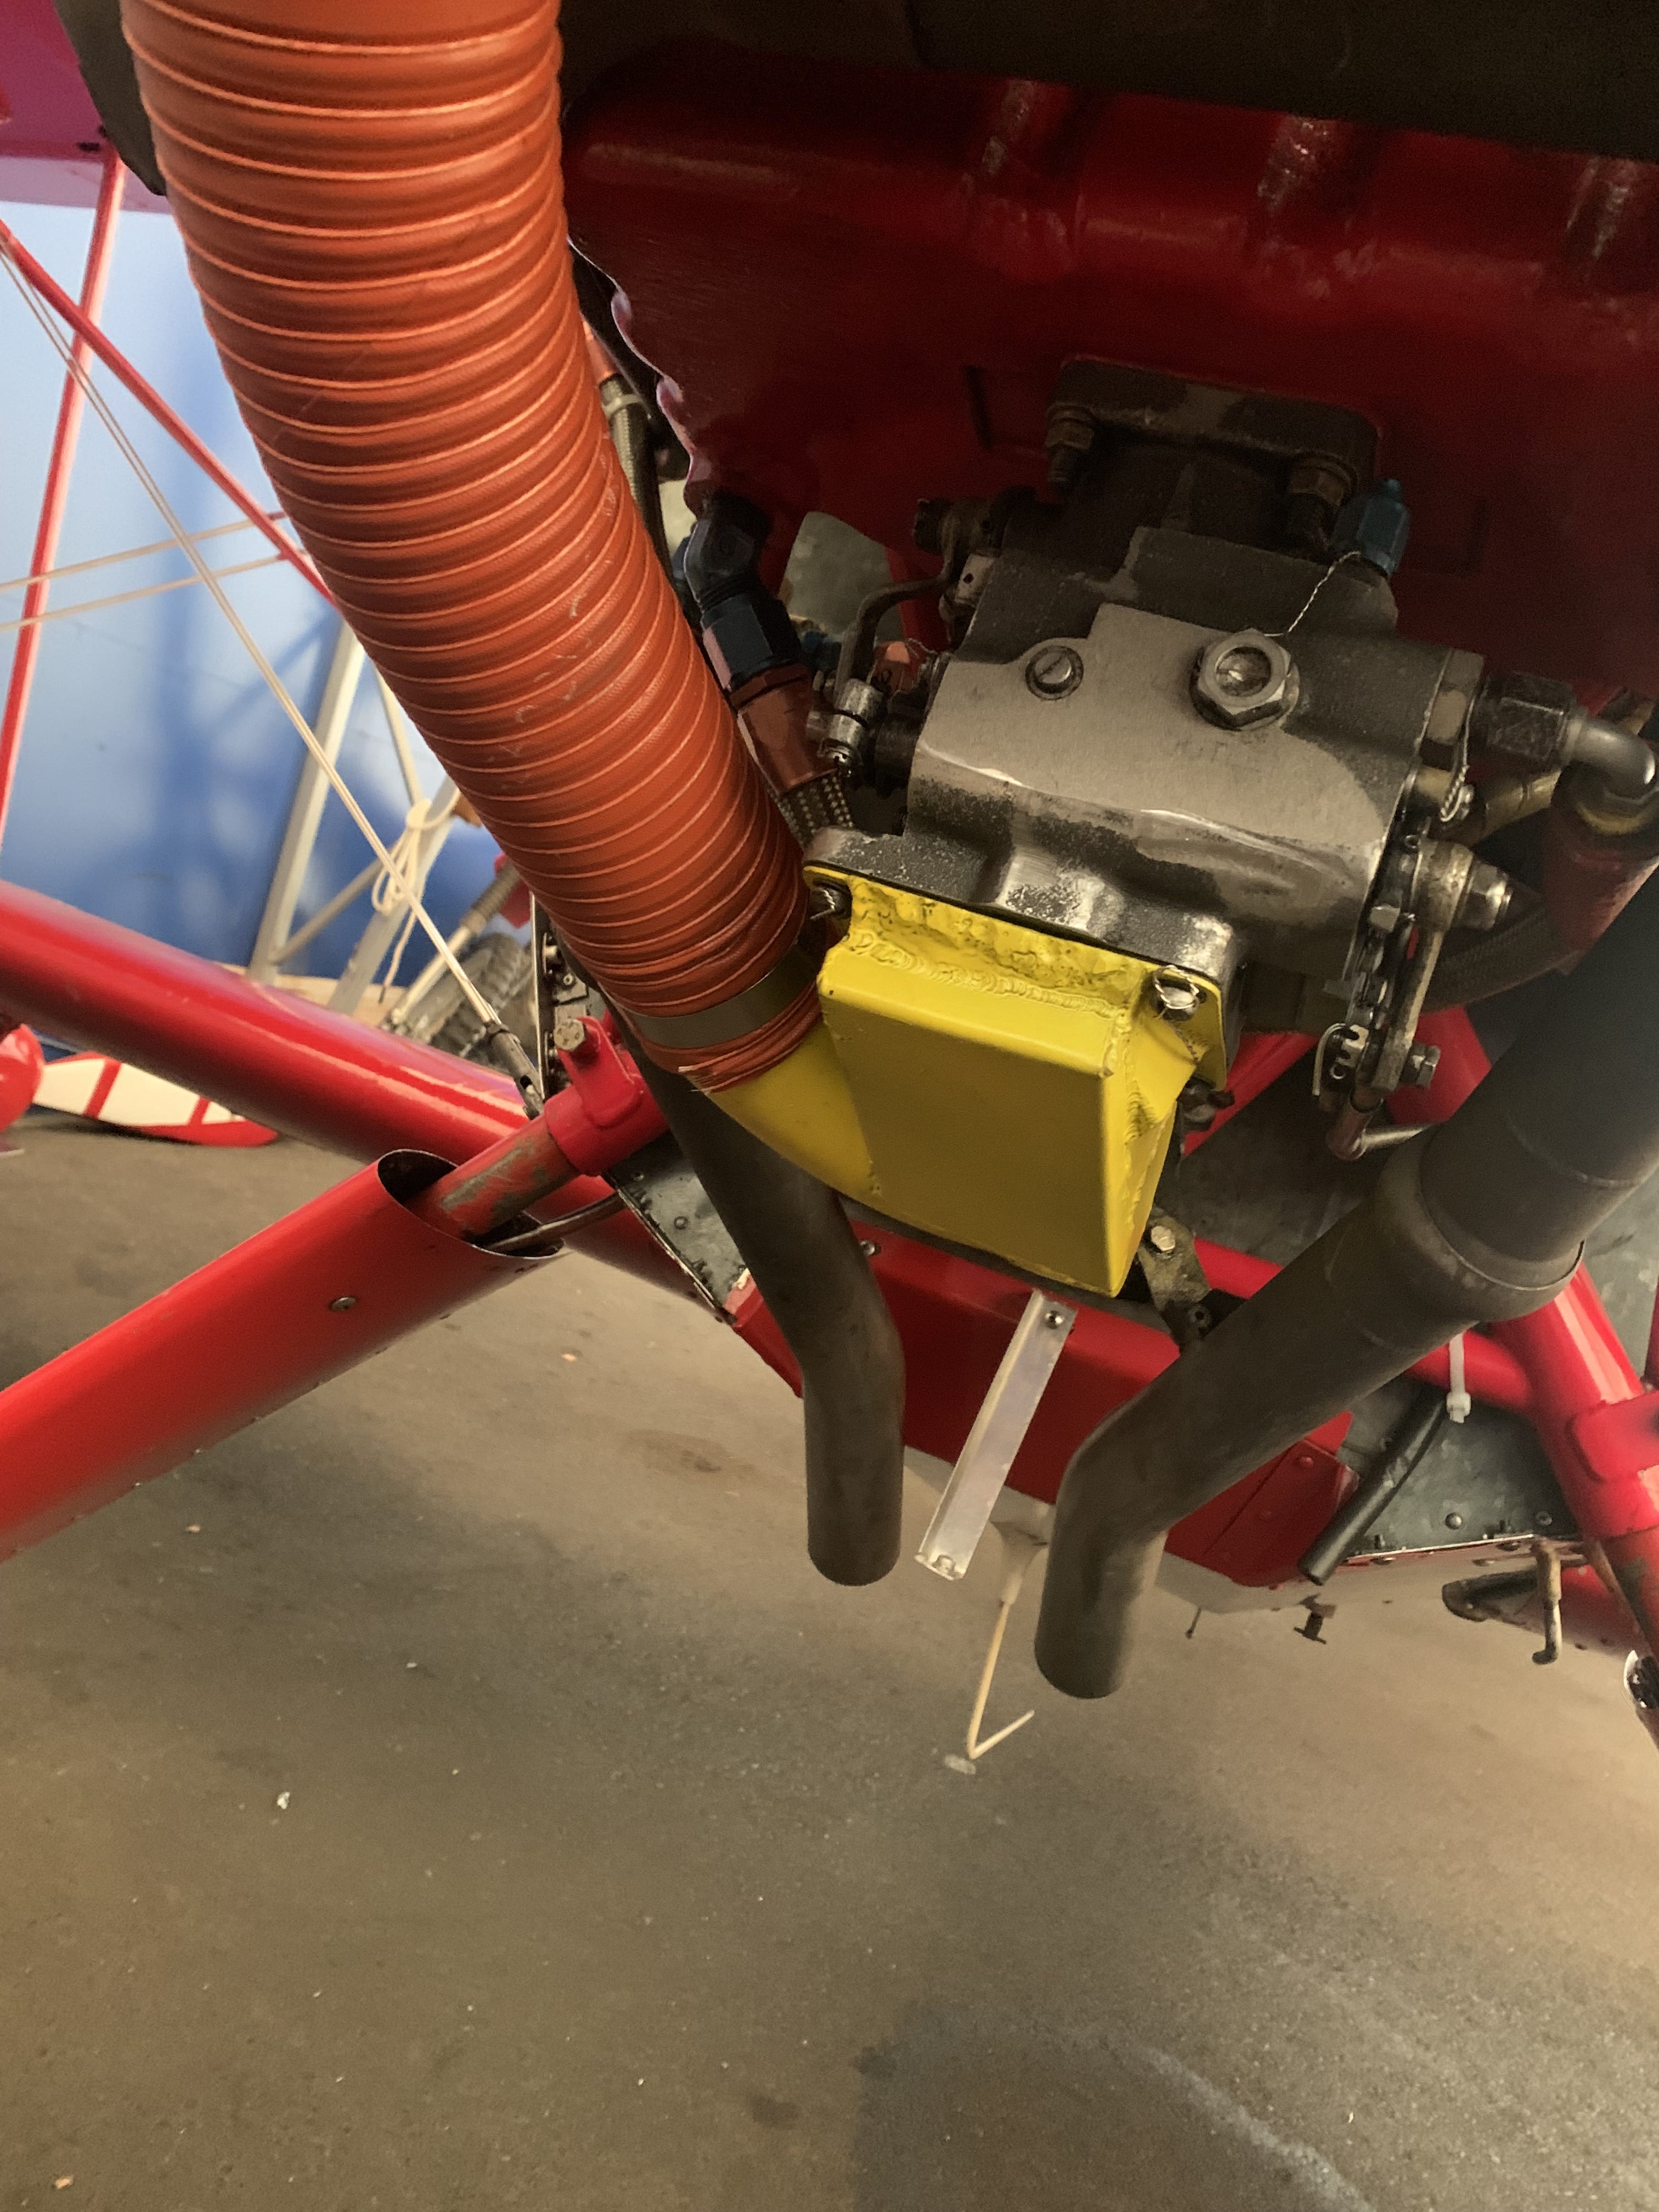 |
|
| Mounting the cowling to the firewall. |
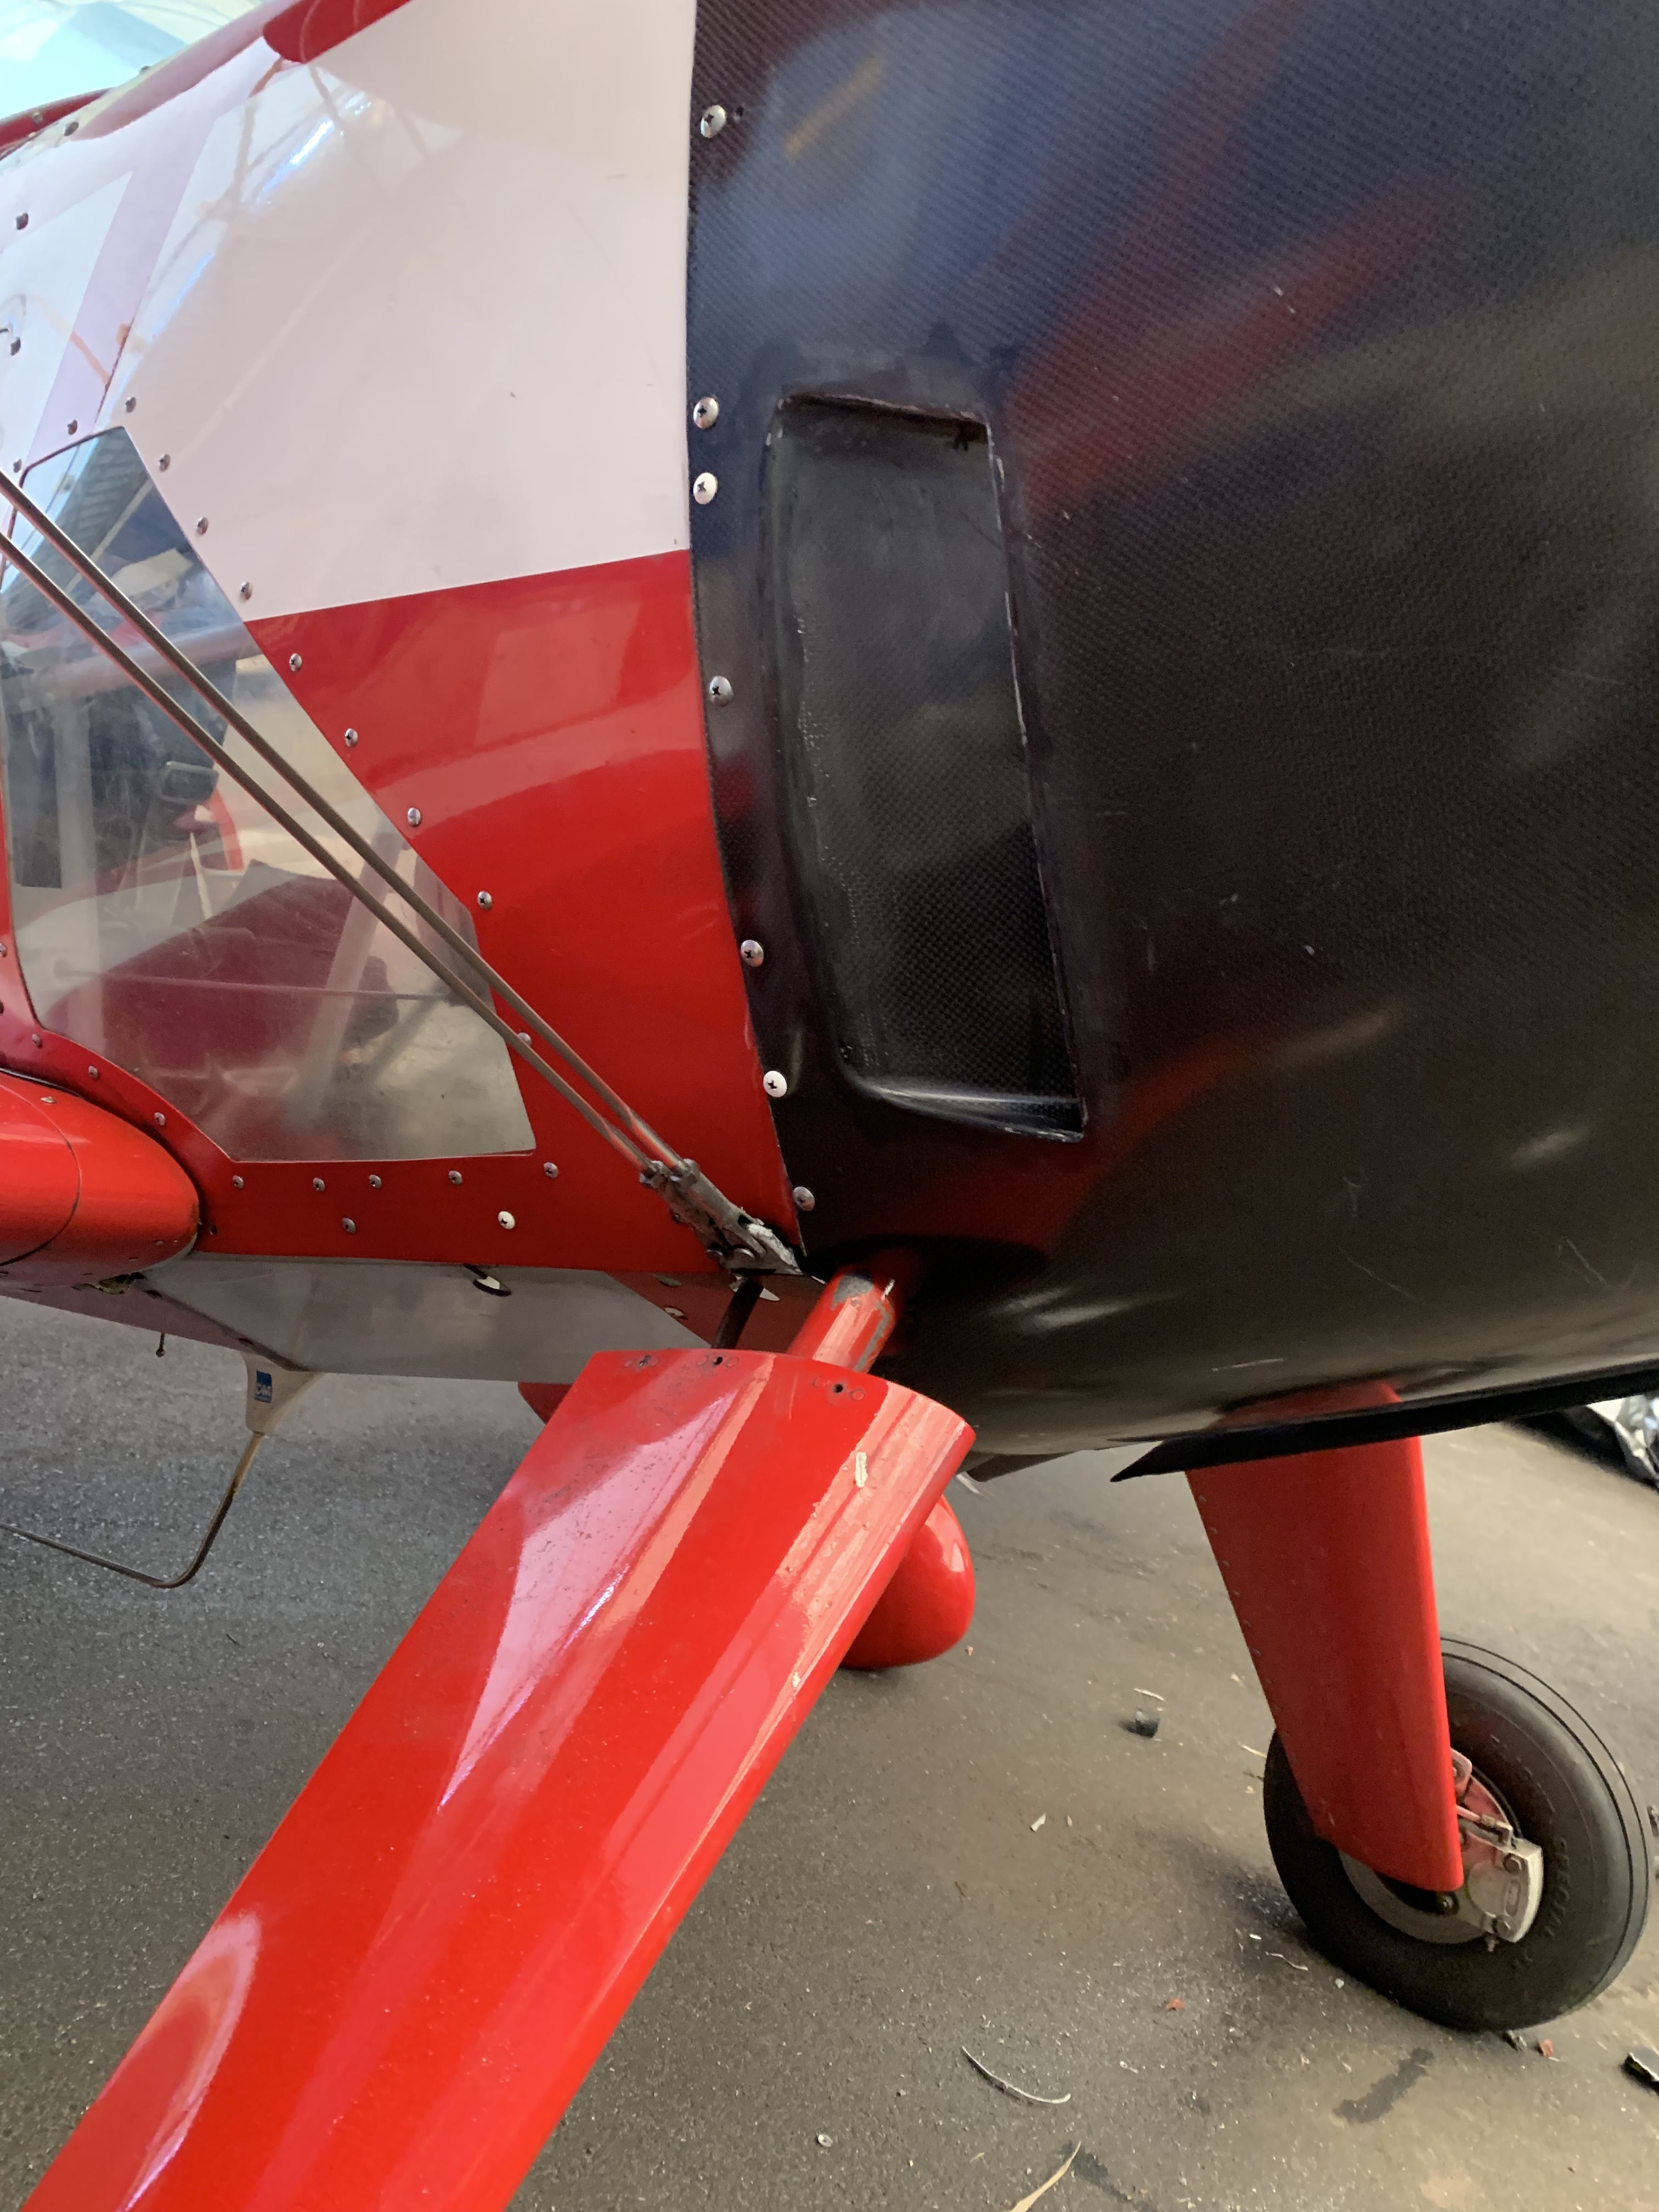 |
|
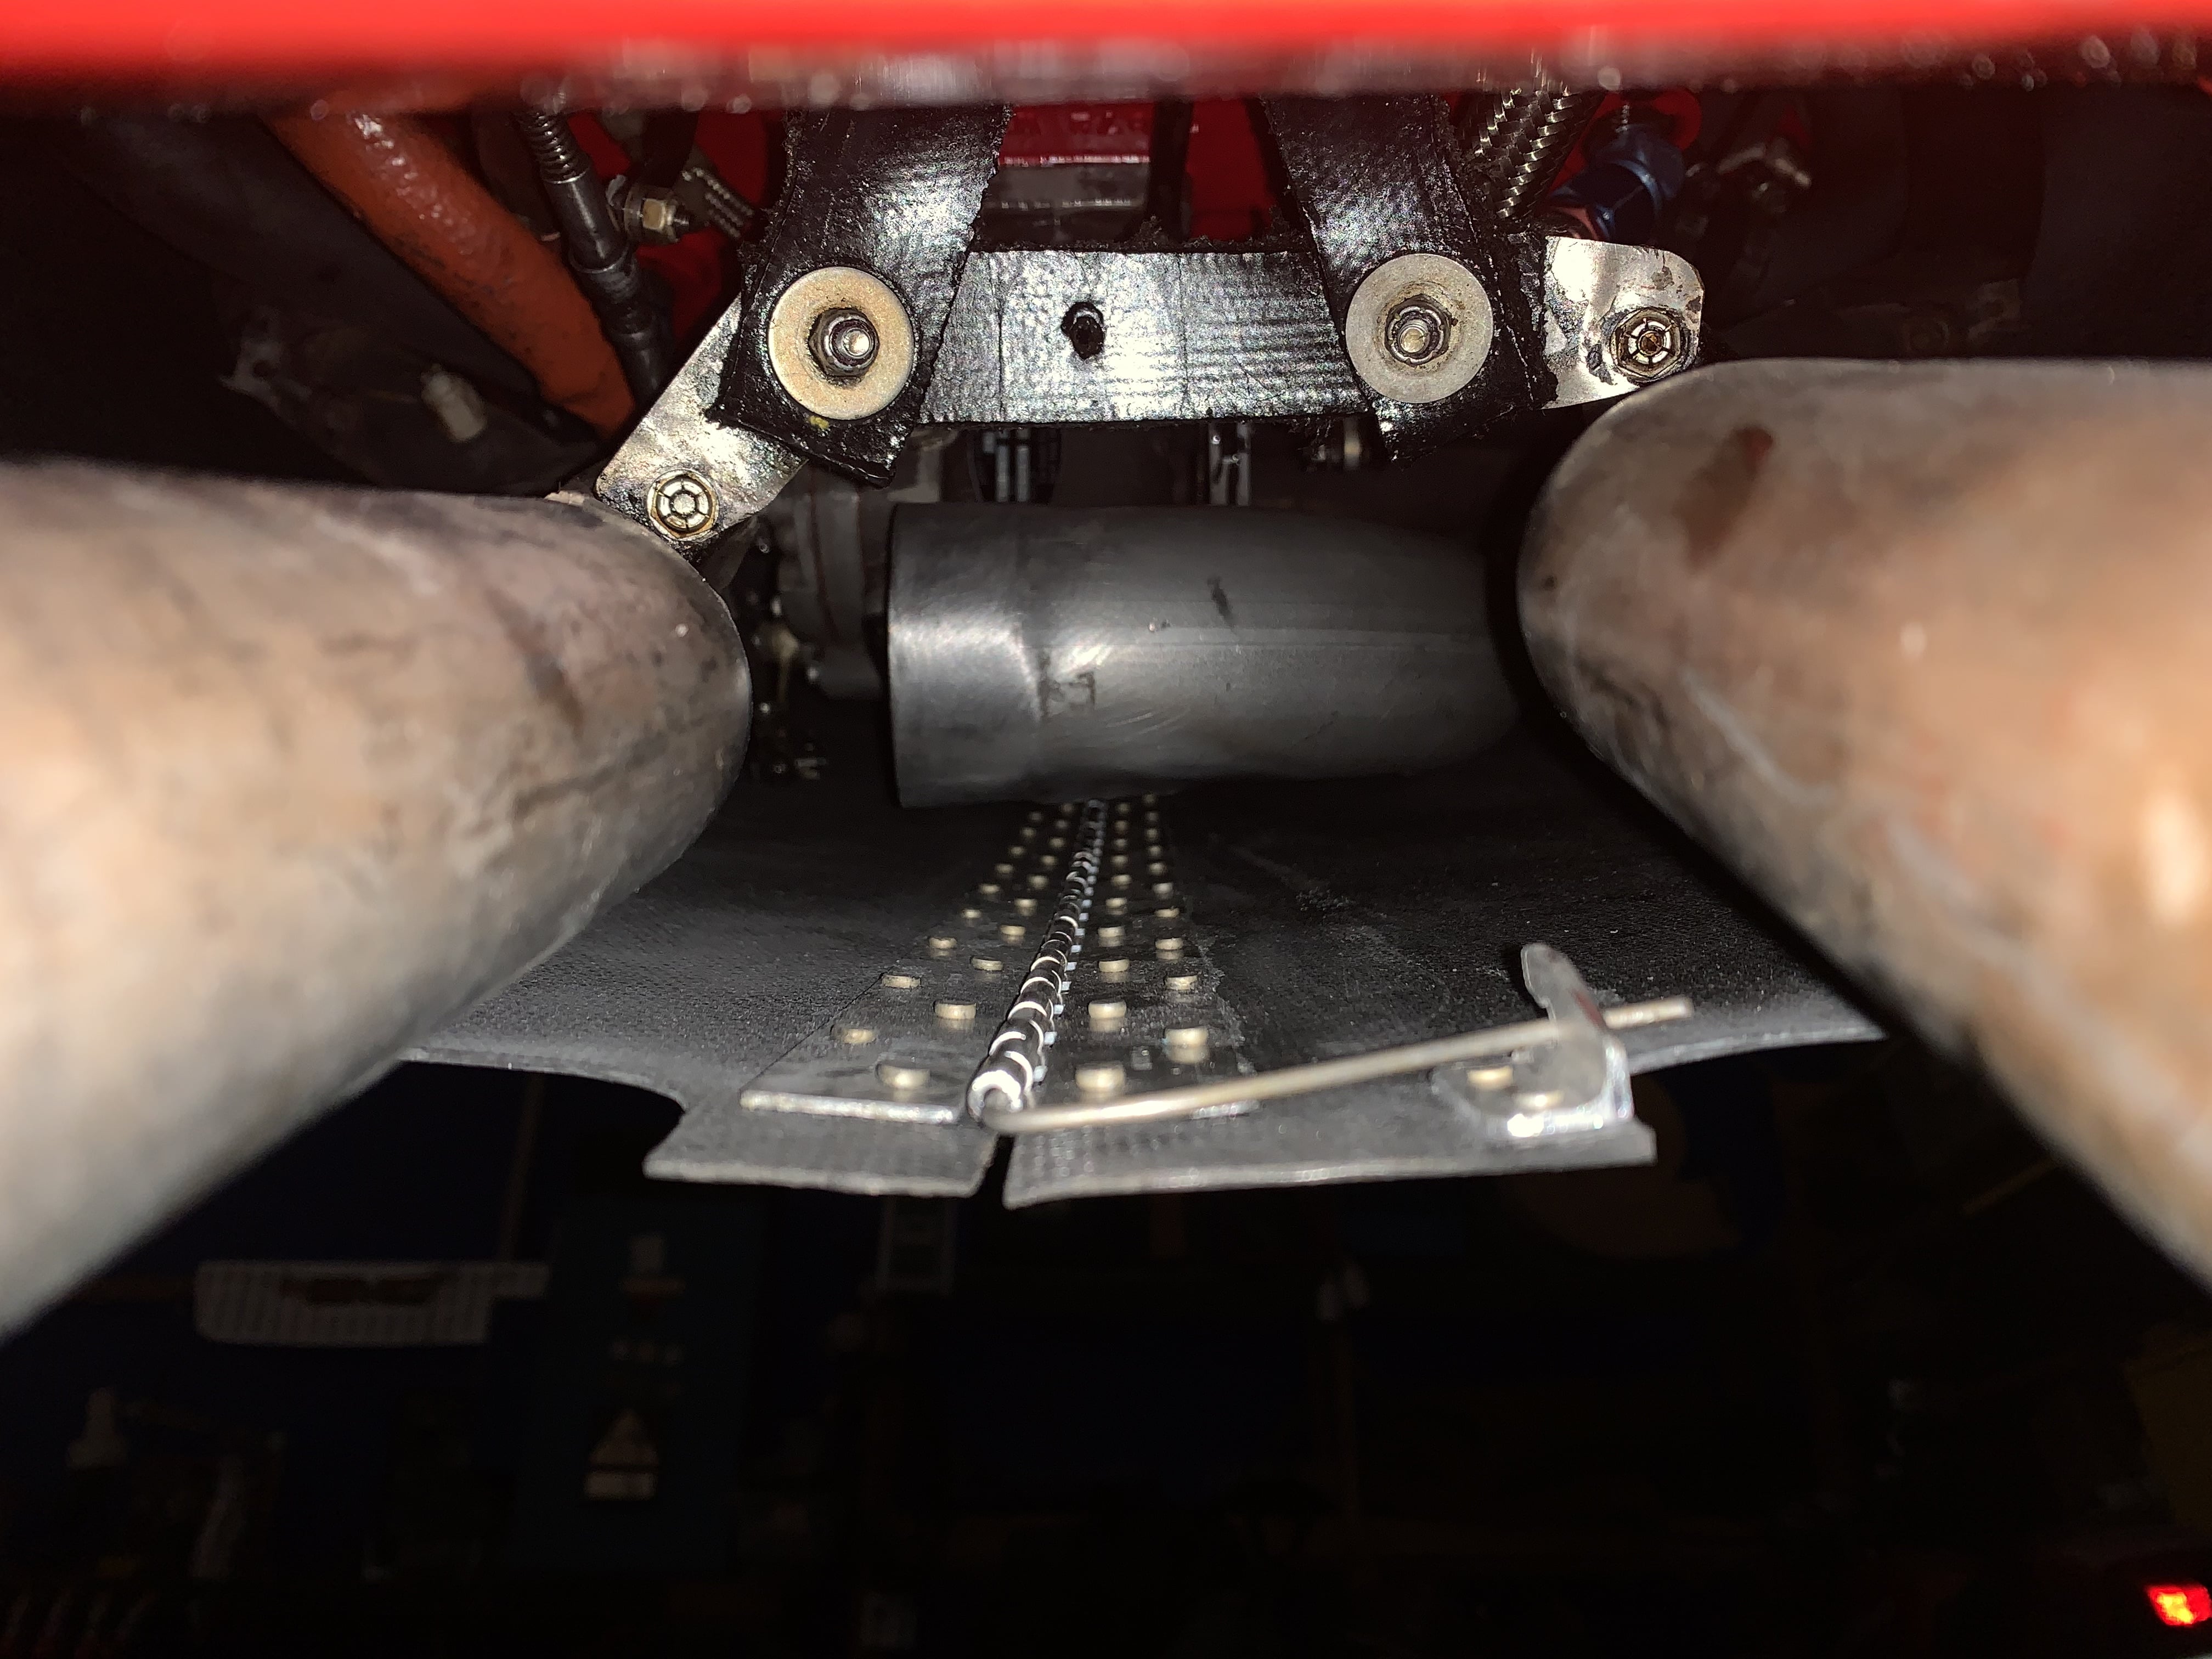
| It all just fits. You can see the hinge pin lock on the lower left |
 |
|
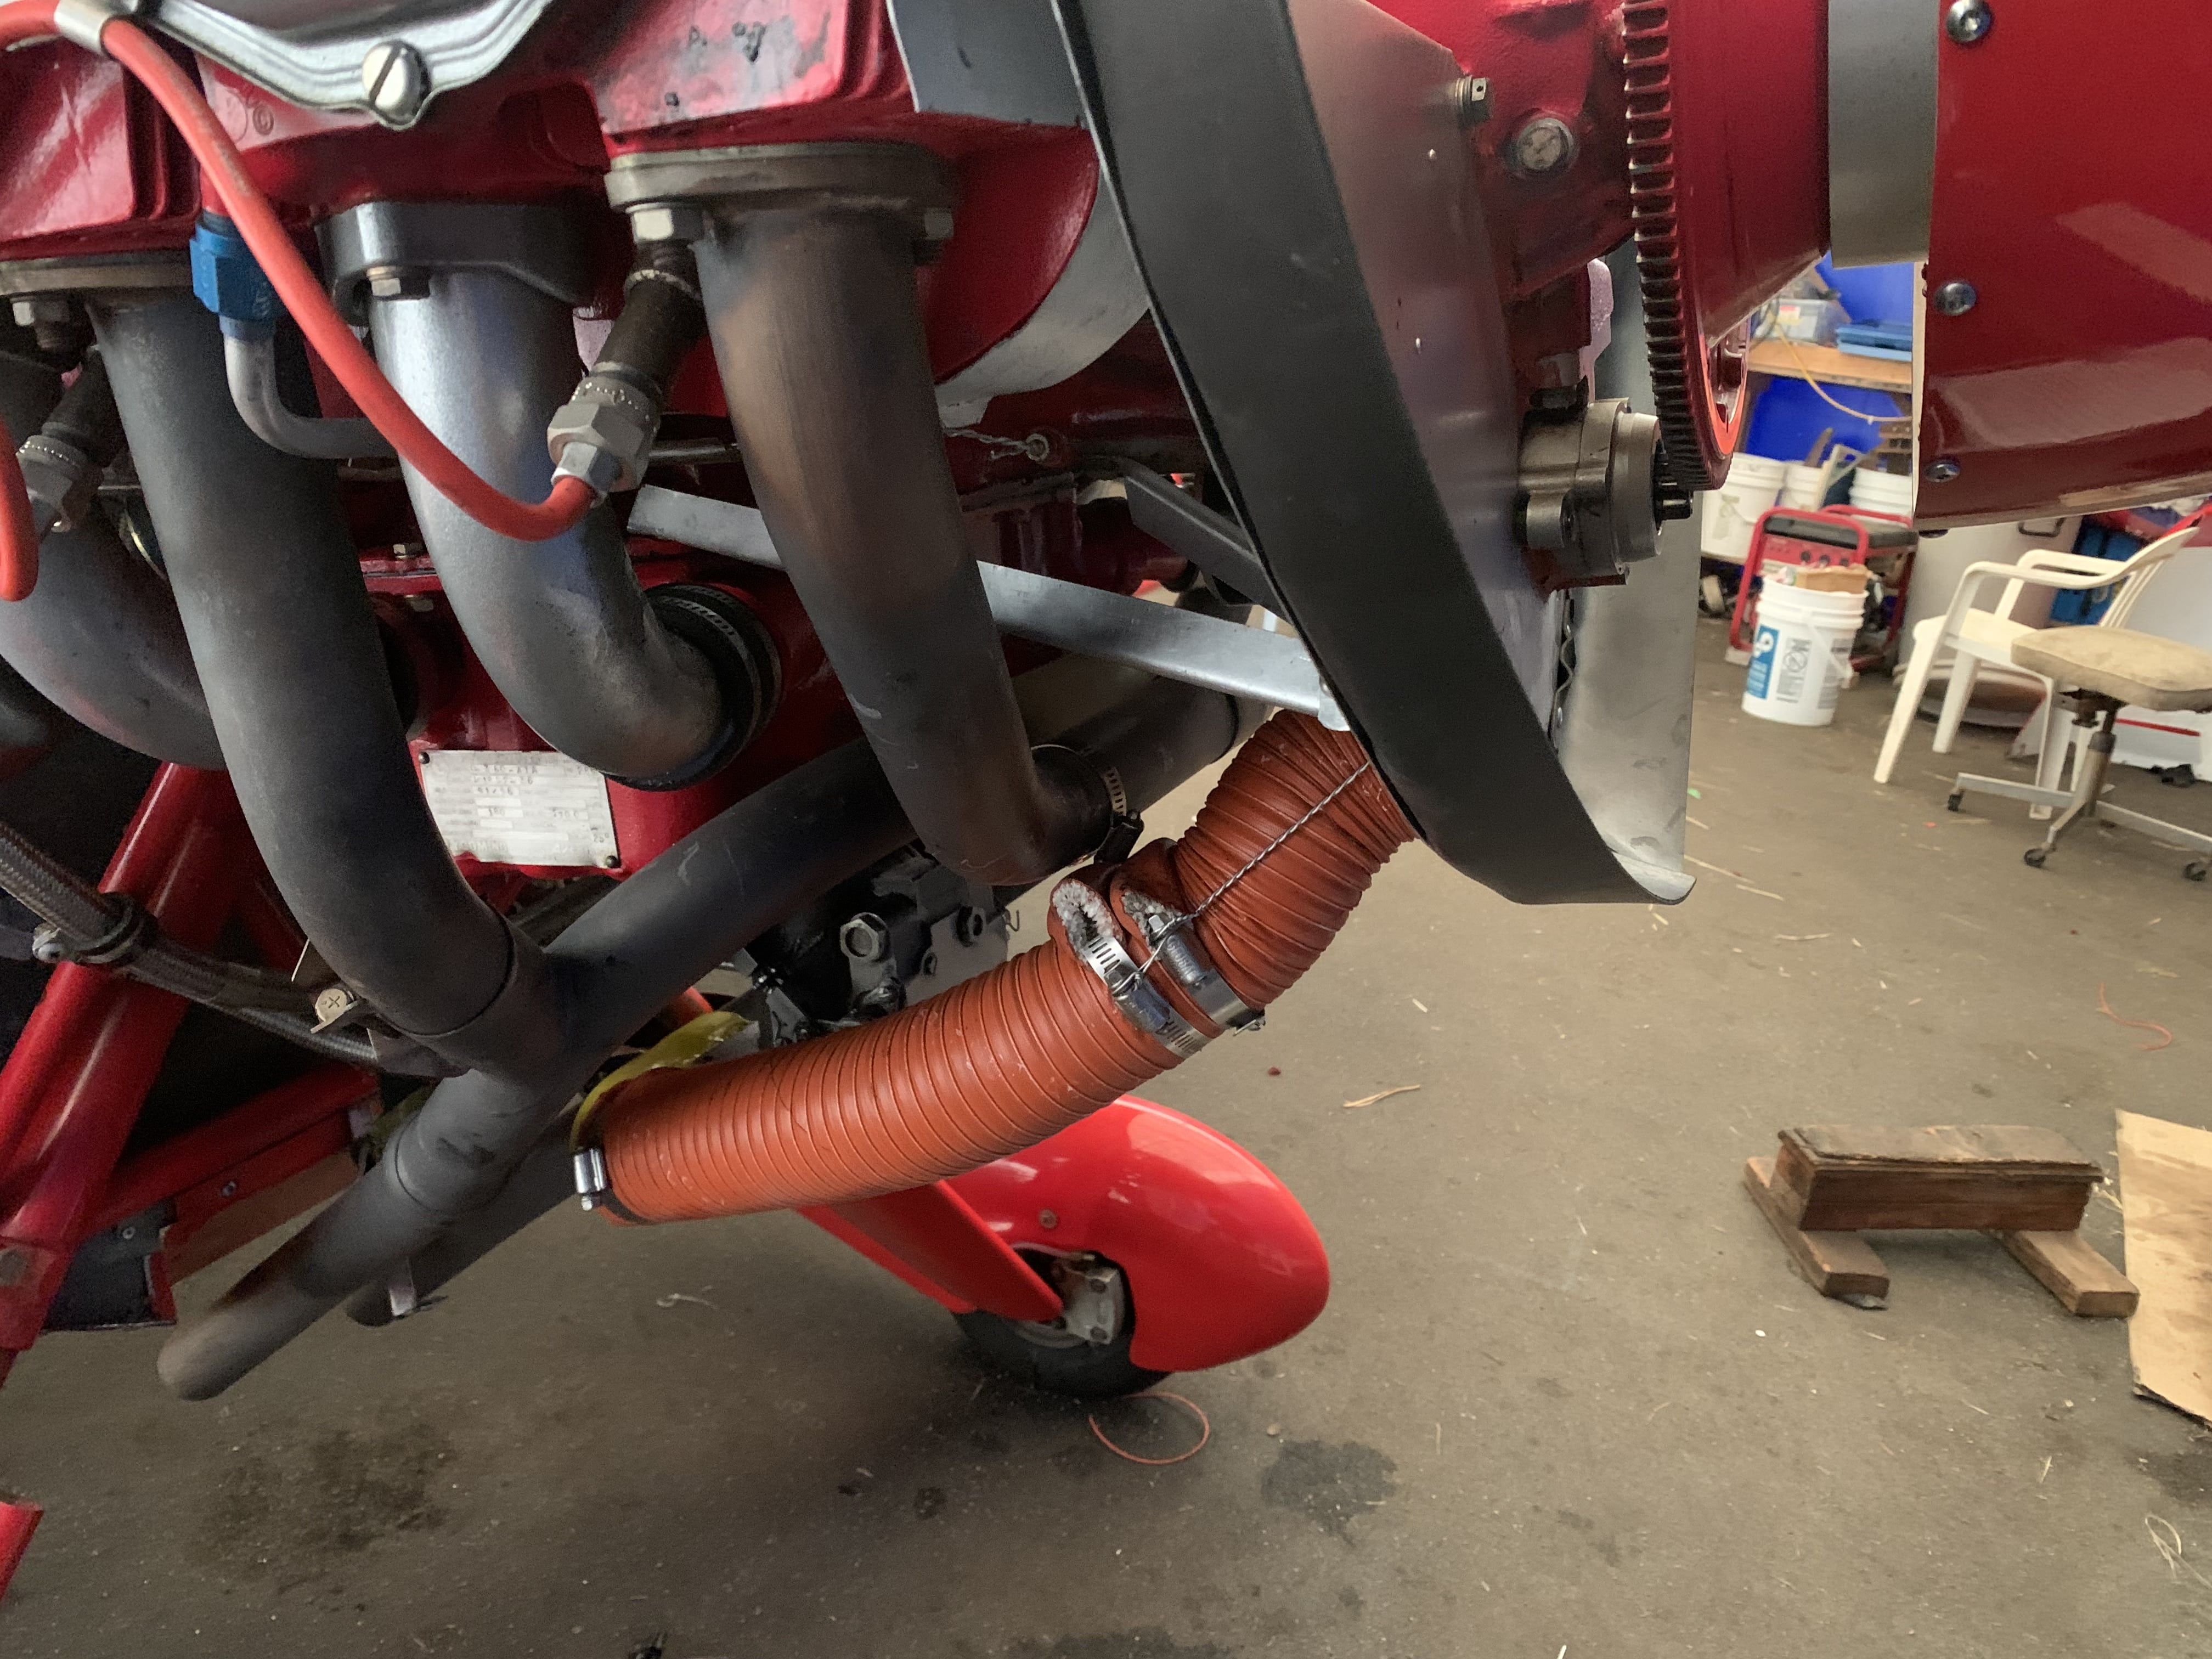
| front baffling detail |
 |
|
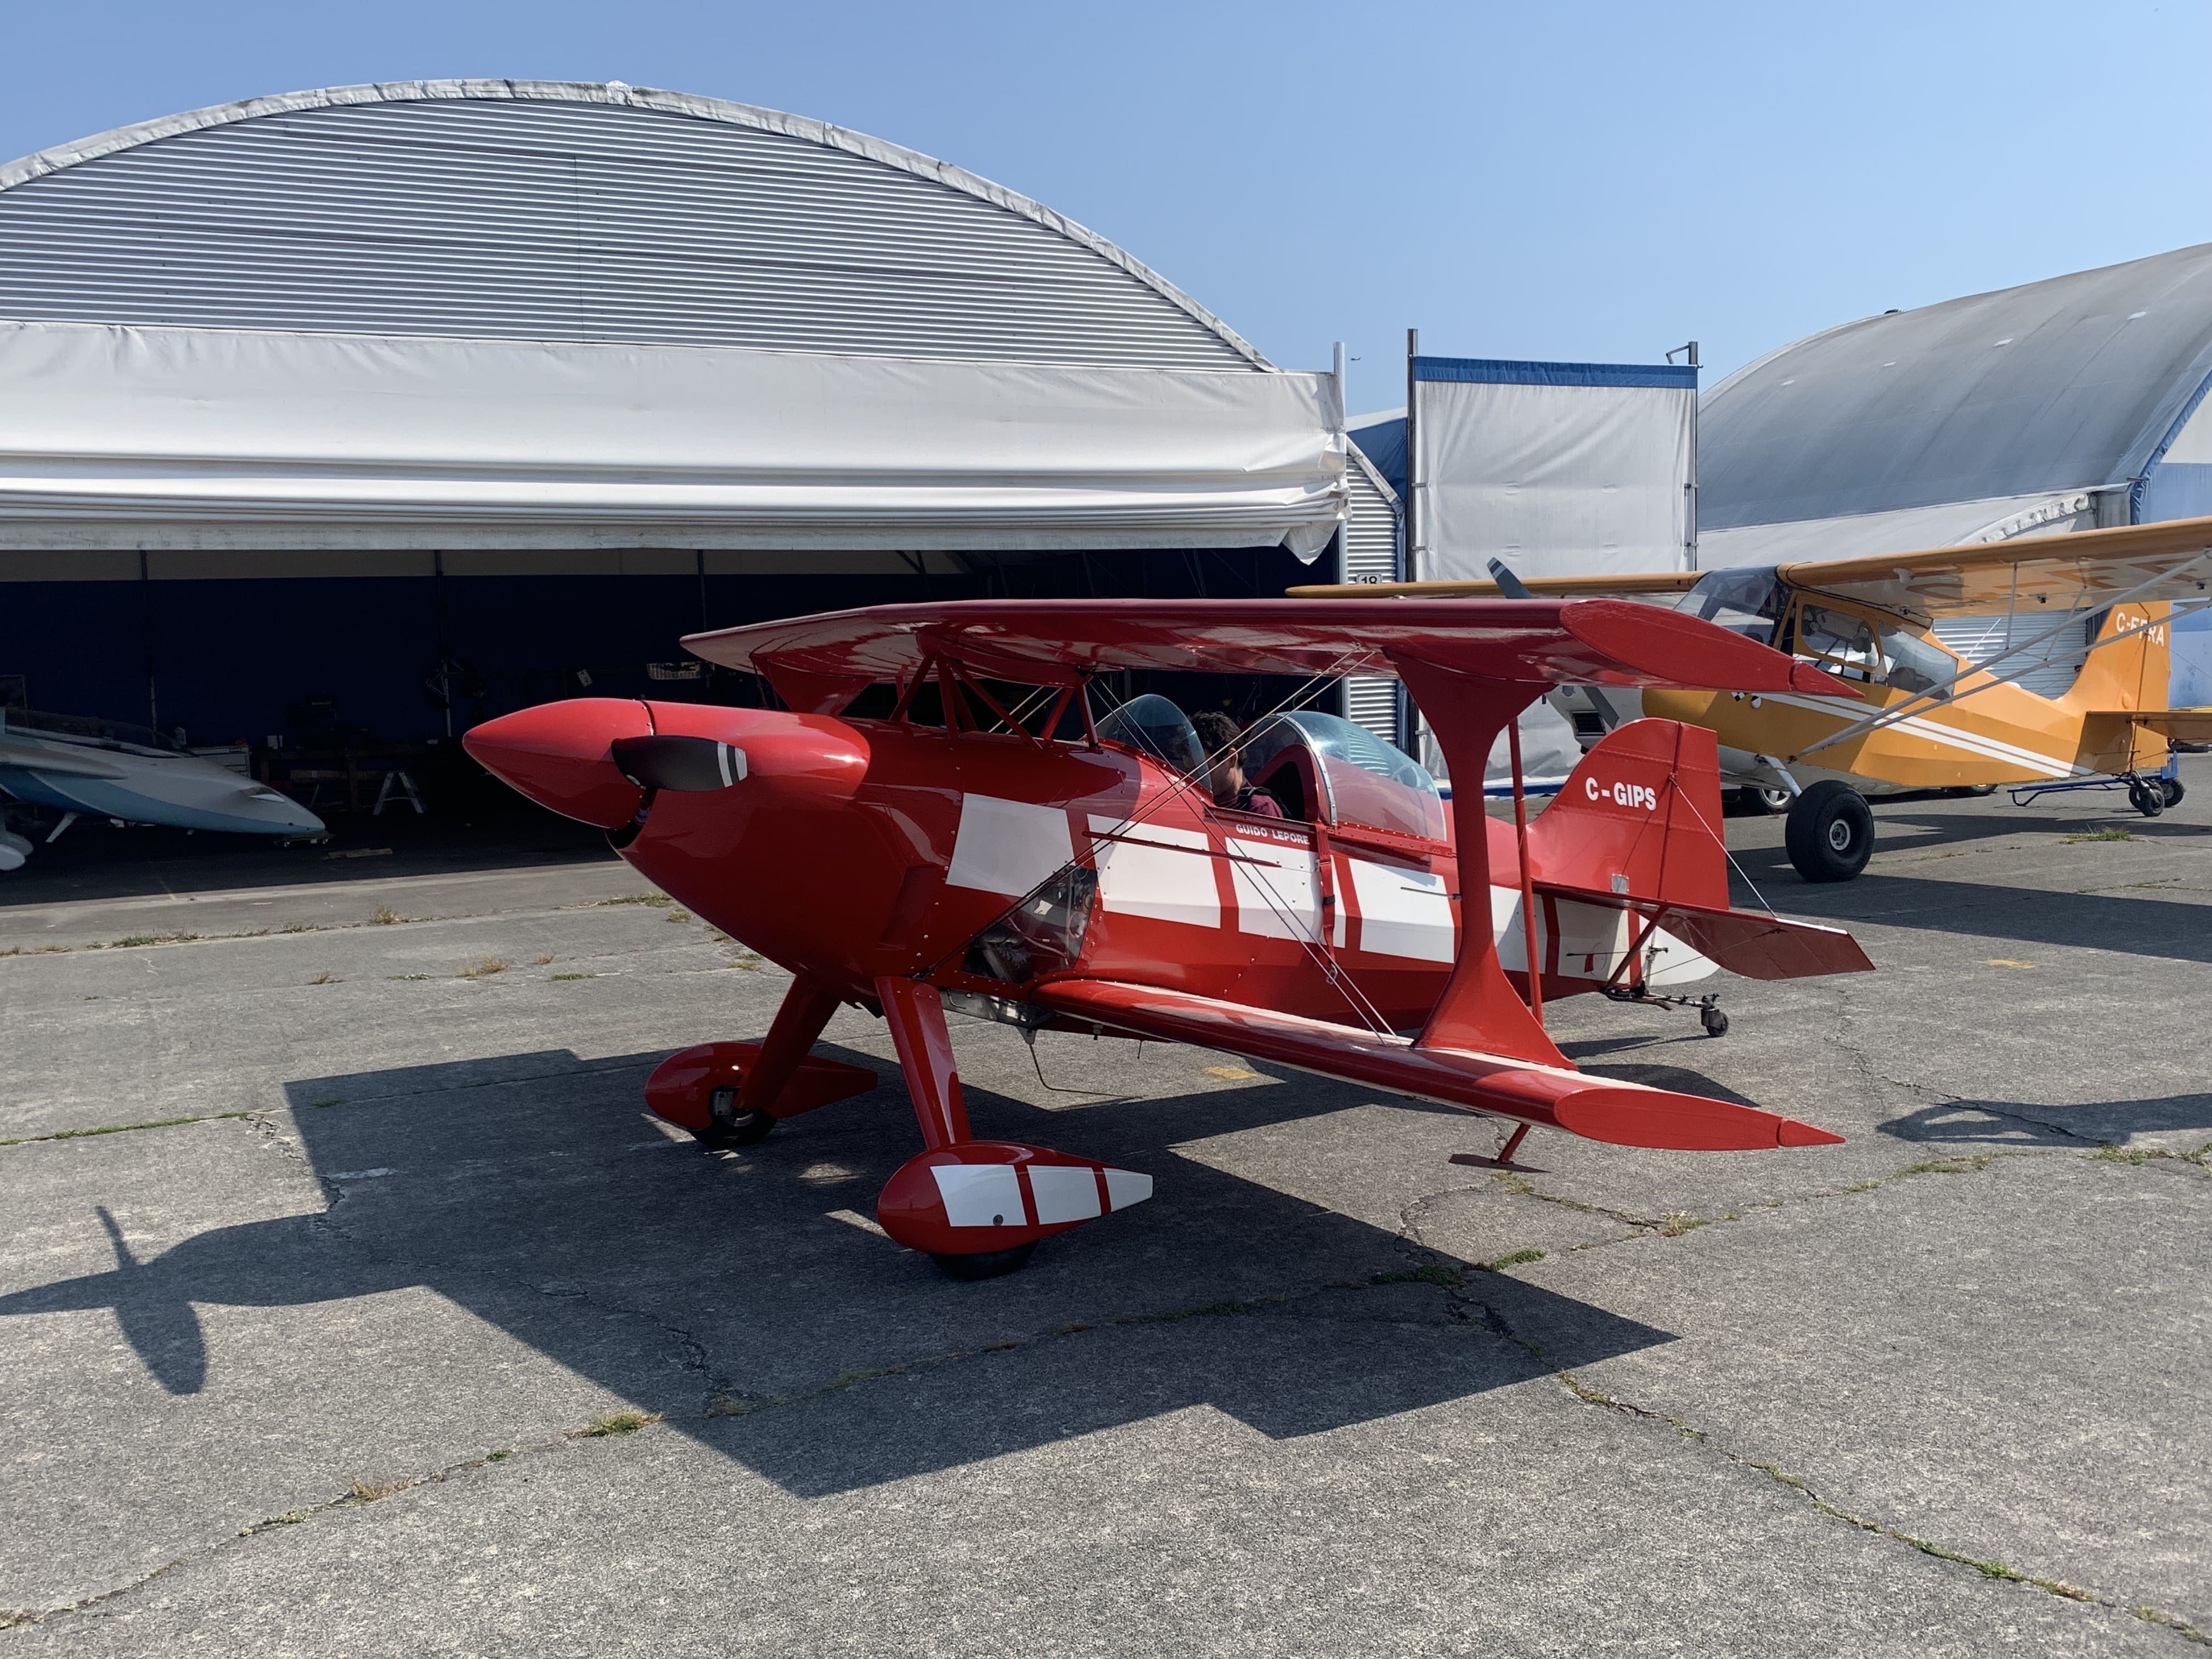
| Finished. My last mod, I promise. Ryan Lepore doing the test flight. |
 |
|
| 2024 | ||
| Updated wiring, installed a start solenoid, replaced not-so-trusty Odyssey with an EarthX900. MicroAir 760 sent in for service, deemed BER, so Yuasa handheld into the breech for now while I find a radio. |
 |
|
| Ground handling getting
squirrely from the worn out Haigh tailwheel. Welded it up a
second time and cut a new groove. New locking lever. Tracks a lot
easier on landing now. |
 |
|
Updated Sept 12, 2024